

As an Amazon Associate I earn from qualifying purchases.

[Music playing] [Intro] Come take a look at this view, it’s pretty
sweet. I try to stay as productive as possible when
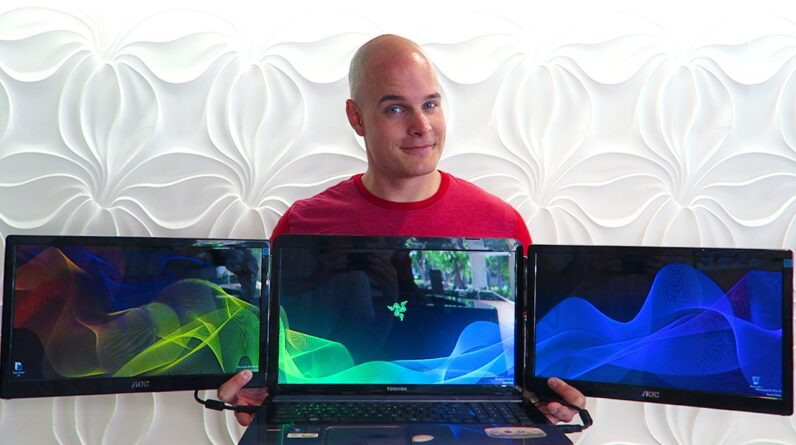
I’m traveling so one thing I’ve done to help me stay productive is I built a triple
screen laptop. You might have heard of Project Valerie made
by Razor; their triple screen laptop? The side screens don’t actually fold in. The laptop I’ve built is collapsible. Let me show you. So this here is my mobile battle station. It’s got 2 extending monitors on either
side and I’ll show you how to build these in just a second.
I just want to show you that this screen is
fully functional. I can take windows and drag it across and
drop it on either side, and the laptop is 100 percent portable. It’s got some interesting construction practices,
but these hinges right here allow the monitors to fold completely flat. Each of these hinges was about 2 bucks and
the side monitors were around $100. So it’s a pretty inexpensive project, comparatively. I was inspired when I saw Project Valerie
at CES this year. So let me show you how I built my own. So this is the beginning of my triple monitor
set up. Right now I’m using one of my old laptops. These monitors on the side here are entirely
powered and receive all of their information from a USB cable so there’s no power adapters
or anything like that.
These monitors aren’t super awesome for
gaming; they have an 8 millisecond response time. But they are super portable because they only
have that USB power connector and display connector. They also do this weird thing where if you
tip them sideways, they will turn back on and the orientation of the screen will be
this direction instead which would be awesome for browsing Reddit. Or, working on something on this computer
and having information on this screen as well, whether you’re like editing videos or working
on a project.
And that’s where the triple screen laptop
comes into play. [Sound of ripping plastic]
They do have the vesa mount on the back so you can put these on like a monitor extension
arm, but since I have limited space on the back of my laptop we’re going to have to
use something else. I’m going to use these door hinges to hold
the monitors in place and allow them to flip out. These glues right here, these are called Epoxy. I have 2 brands: I have Lock Tight and JB
Weld. I’m probably going to use the JB Weld just
because it has a higher PSI which means it has more strength and holding power. So right now I have some tape wrapping around
the side of the monitor; just holding it in place and trying to get an idea of where the
hinges should be placed.
Epoxy is 2 different chemicals that mix together,
and when they’re mixed together they form a chemical reaction that make them hard in
about 5 minutes. This thing will fully cure in about 24 hours. That’s why there’s still liquid inside
of the tubes, but once they are outside of the tubes and exposed with air and mixed together,
they’ll get really hard, really fast. So right now both hinges are good and actually
it’s only been curing for about 2 hours, but the weight on one hinge can hold the whole
laptop. So this epoxy is pretty strong. I’m going to clip on the first screen right
now, and by clip on, I mean epoxy.

So I’m going to put some tape down just
so I don’t’ get any glue stuck to the hinges. I’m going to flip them over and I’m going
to set the monitor down in place right after I finish gluing it. So I kind of have it stacked down on top of
a book and you can see that second monitor, which is this guy right here, is resting on
top of the hinges. And the hinges are glued. It’s not going to stick to the laptop because
there’s a piece of tape underneath.
And then I added some more weight on top of
that to kind of add pressure to the glue and help it dry better. I made sure there’s an even amount of room
between the edge of the laptop and the top monitor right here. So when it folds out they’re still going
to be even with each other. Alright so I’ve taken off all of the weights
and it looks like…it’s been probably about an hour and the instructions say that this
stuff gets tacky in about 5 minutes. And it actually holds pretty pretty strong,
even after an hour of just sitting there. Let’s see if it stands up on its own. I got the door hinges on the back here.
So this second screen that I’m going to
add right here, I guess you could call it the third screen, is a little more tricky
because it needs to open up and it needs to sit on top of the second screen that I added
there. So what I’m going to do is I’m going to
stick this hinge just like that, so that part is stuck to the laptop and then this part
is going to fold up and attach to the side of the third monitor there.
And I’ll probably do two of them just so
that there’s more support. And this one will actually have a flat surface
for the hinge to attach to. So it should be just as secure as the other
one since it had the curved area of the back. So this time around I’m making sure that
the hinges are also straight with each other because if the hinges are kinked or skiwampus,
they’re not going to fold in the same direction; one might fold this way and the other one
might fold slightly that way which wouldn’t give a direct swing to the monitor.
So this one I’m using the edge of the laptop
and just pressing the bulge of the hinge right up against it; same on both sides and that
will make them both equal. [Sound of plastic ripping] One of my favorite things about having a triple
screen laptop is on long flights like this I can get 3 times as much work done as I would
normally. [Music playing] So when I was at CES I did see the real Project
Valerie on display, but apparently it was misplaced or stolen. So Razor, if you need a working prototype,
I’m your guy. Thanks a ton for watching. I’ll see you around..
As an Amazon Associate I earn from qualifying purchases.


