

As an Amazon Associate I earn from qualifying purchases.

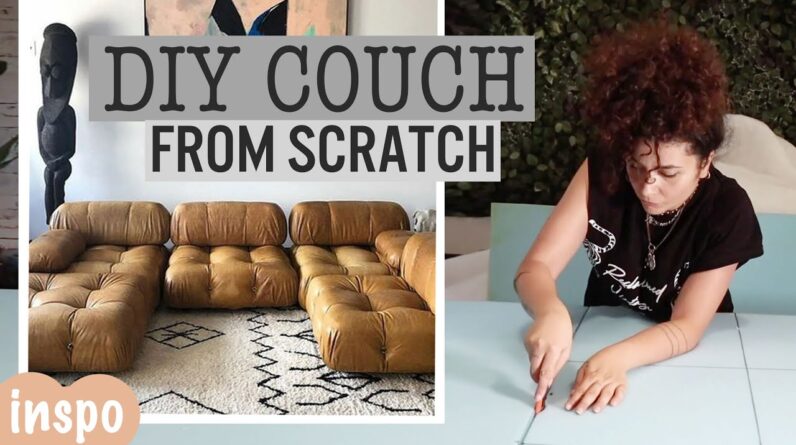
Yes. It's happening! Today we're gonna experiment with something that no human being has ever been brave enough to attempt before; we're gonna take a girl that never has done a couch, a sofa, or not even a chair. And make the most desired couch in history. It's from Mario Bellini, and it's just gorgeous. There's no star who doesn't have this in their living room! Just in case you live on a completely different planet and you have no idea what couch I'm referring to. Here are the pictures of the beautiful gorgeous and so versatile couch. You can compose the pieces as you like and make it look different every time.
Ah yeah, if you had any doubt, that girl is me. And if i can pull this off… Next step is conquering the world! Try to take over the world! So this is the current situation of the entrance of my apartment. I don't know why my boyfriend didn't kill me yet. But all this is needed to make our creation. What you need is foam. We have to reach 30 centimeters but that's too expensive, so get three times 10 centimeters in height. It's gonna be the solution.
More foam really tiny and thin. It's just gonna be added on top to make the shape more rounded. Then the fabric, you can choose any color, fabric, material, that you wish. This doesn't matter. And the wood.
I have three pieces because I composed three pieces of the couch. Another funky element that you need is these hooks and holes. Don't worry I'm going to leave everything in the link down below. Now let's start! If you know me, you know that I love to make tutorials with absolutely
no equipment. That's why i use this trick to sign the dimension of our couch.
The size that you need is 90 times 90 and that's why I signed 30 30 30 centimeters. Mark every single corner and then drag the line. In this way we're gonna have the size of the couch, and also we are gonna have written down the spot where the lines cross. We need it later. Do this three times because as i told you we need 30 centimeters of height. three times! Then go ahead and connect all the pieces of the foam together. Wait 20 30 seconds, and then put the two pieces one on top of each other. Put something heavy on top. lift your pretty bottom from the foam and now
spray it again because you need the third layer. Stick on top wait always 20 30 seconds, apply
it on top and there we go. Now we want to draw the length of the line all the way. We are going to need this later to pass the fabric inside. You want the corners to be not so squared as you see them. So my suggestion is to go inside with your precision knife, and start making it rounder.
Also in the lines that we drew before because you're gonna need to stick the foam inside the fome.
You're gonna have to make the cuts on all four sides. Magic! On every single side. That's where our initial lines become really handy. we need to make holes on the top of the
couch because it has this sort of Chesterfield CHES-TER-FIELD shape. This is where we're gonna have to press the buttons inside. So go where the X crosses on top of the couch, and start digging inside. You want to reach something like five-six centimeters of depth. Now take up the wood my friend! We're gonna do exactly the same thing. Place your ruler make 30 30 30 30 30 30
30 30 on every single corner, then you're gonna drag your line. We're gonna have again the lines and the X where we want the middle of it. Now we're gonna have to start drilling on
those X . Why? This is where we are gonna pass the thread, to catch the buttons from the other side on top of the couch. Time to stick the wood to the foam. Second round and I learned that; like every single spray, it's way better if you keep the material vertical and not down.
Accidentally bang the light on your ceiling…. and go ahead with the tutorial. guys we arrived to the moment of truth. And that is that is that we are gonna have to sew two pieces together. You can actually decide to go and buy super expensive material, that is kind of like custom made. That is gonna be two meters high, but normally materials are 1 meter 40 or 150 times tipmes the length that you're going to buy. So normally you're going to have to add those 50 centimeters, and that's what we're
going to do today, even though we bought over 10 meters of material. Basically, every base of the couch needs two meters time two meters, and that's why we have to add two pieces together. So the length just make two meters, and that's easy! For the height, we're gonna have to do 150 and add those famous 50 centimeters on top of that.
Always place the pretty part of the material on the pretty part. Then start putting it together. This because after you're gonna take it inside
out, and the sewings are gonna be in the inside. You go ahead with your sewing machine, all the way to the top. Super long… and we're done! Luckily the internal foam has a height
of two meters so this one is gonna be… Get rid of those scissors! It's easier with
your hands! 2 meters times 2 meters; just rip it off! Now guys; i will be honest with you! This worked only the first two times.
Let's call it the lack of the beginner. Every other time this didn't work! So what i did was using a metal thread, and pull it from the top hole to the bottom. But the bottom hole in the wood is super tiny so usually, you cannot catch it. The easy way is if you do it from the bottom to the top. Now let's go ahead. You want this metal thread
to go to the top, and then mark the point where you want to stick this little button. You can go to a button store and ask them to make them out of the same material of your couch. That's what i did. Then you are going to stitch them exactly where your metal thread came out from. Then you're gonna make it look like a little hook, tie your thread; not a normal thread!
It's a super, super thick thread! Tie it on your metal, and then start pulling it from the bottom.
In this moment, we are on a secret mission under the couch. This is where the thread came out from, and we are gonna have to tie it to this bottom so to pull it and tie it. it is actually very important that
you pull the thread as tight as possible, so that the bottom on the top of the couch is going to be inside the foam. Because that's the chesterfield effect. We're going to do exactly the same thing also on the second side. There's four holes per couch. As you see I'm going inside with the needle, putting the thread on the metal thread, pulling it from the bottom, and we have the
the same exact effect. We're gonna do this four times. Now how does this super dope couch work? It's made with little hooks, so an important part of this, is making the metal holes in which the hooks and the rope are gonna pass inside.
This is the mechanism. It's super easy, you just bang your hammer on top
of it, and it creates the whole. Second round you add the metal thingies, and you hammer them again.
There it is! magic! magic! it works as a super pretty and aesthetical hole, inside of which we're gonna pass our ropes. The placing is exactly at the same height of the bottoms that we place. Now let's go ahead with the hooks and thread, the rope actually! First, we pass the rope inside, and we want to check that it's the right amount of rope before we cut it. We're gonna make a little hook on
the top, tie the hooks, It's super resistant. Do it again on the other side, and there it is! It catched! let's pass on, and do it on every single side.

So it's eight per couch because it's four
corners, every corner has two, and that is eight! Look who's coming up now! Our best friend; the
staple gun! Super important is that before you start stapling randomly around like i'm
doing is that the first two staples are the ones on the line of the bottoms, because that's where
we want the material to go inside. Do you remember that we made a cut there? so that the material would go more inside? That's what we're doing.
Hercules move to flip it around. And again we
go, follow with your hand pushing it inside, and staple pulling as much as possible.
All over. And again on the height of the button you have to staple harder. What happens in the corner, is that you find yourself with tons of material. So basically here you have to be very
creative and very patient in order to fold it and staple, folded and staple, so that it comes more elegantly as possible. But still ruched on the sides. We're going to cut all the ugly side under the couch, and then we staple more! Because we do not want to do this couch again! Because it took forever! Yes! you're going to be exhausted!
But you have to keep going! This part is finally done, and
basically all the bases over! We have to do also the half couches, because
in this design, there are the big ones, and the small ones, that you can put on the
feet, on the side, and decompose it as you like. But i guess it's a bit boring to show you
all the process again, so i'm gonna use a little bit of magic for that! My god, i wish all the couch was that easy! We did the same thing but with a dimension of 60.
Oh baby, it's time to make the pillows! the pillows! What we're gonna do is make them 30 centimeters deep and do it three times.
Exactly in the same way of before. We're gonna use the glue. ut wait a minute i'm not gonna get on top of it. Just put some heavy weight, the food of your dog is good enough. Wait a few seconds and do it again. The back pillow is 30 centimeters of depth and long exactly as the couch: that is
90. Now this is what I learned in the process, you have to spend more time doing the curves of
the couches more rounded. You don't want to do just one cut but way more cuts. Go ahead and shape it.
Literally, shape the foam! yep, yep like this one. The only thing left to do is the side pillows where we put our arm, This one's instead are only 20 centimeters high, but guys we saw this
process too many times, so let's just show you the result.Tthe size is 20 centimeters high, so you need only two layers of foam. I'm coming closer to show you. The length instead is 60. so basically the 30 of the depth of the back pillow, plus the missing part. First idea was to just put some fabric on top, but i understood; "no lazy girl! no!" The original one has two cuts on
the top, so we're gonna have to use a rope, and tie it very tight after that we made the cuts on the 30 30 like always.
Use the rope to make the knots exactly on where we made the line so that
the shape is going to stay the same. Unlikely for us the material also has sewings so what i did here was to make three shapes of the top covering material. Sew them together, and this is the result. What we're gonna do now is get our "sushi" and go and wrap it. We place it on top
of the material, same lines on the same lines, make the matches on both sides, and then get our trusty pins. (After we did it a bit better) and go and pin them to corners together, so that after we can sew them. Before taking it out we're gonna make also here the holes where another rope is gonna pass through. I don't show you the process but i just made a hole.
Then you are gonna pass
it inside exactly when you try to fit inside your tight jeans. Corners over here, are again the tricky part, where you're just gonna have to design it as elegantly as you can. Then we hide all the
ugliness inside the sewing, and then by hand we are gonna go and close everything. Now guys i know you
don't believe me… and i don't believe myself either! But we finished the coach, all we have to do is put these legs.
I choose five, instead of four because i didn't want the wood to break. Put something anti-slippery, so that they would not open. Fasten the seatbelt off the couch, and it's done! Guys, i'm absolutely stoked! and I can't believe this turned out so good! i'm so excited!!
But before i show you the reveal of the couch, let's go through the steps that i would have done differently if only i knew because i had no idea what i was doing. So… the wood that we're buying, before starting your work; yes get it as a square, but go and round a little bit the edges, use a
little plate, place it on top and follow the line. Draw a little circle so that it's going to be more
round, and it's going to be easier to give it this roundy and soft shape to the couch.
Number two: the holes on the pillows that you're going to stick on your couch, i did them more close to the line as possible, because i didn't want the thread to be seen from the outside.
But actually what I suggest is to make you do it as outside as possible so that it gives
it more stability, and it's not going to fall off your couch. Number three: the cutting of the foam. You should invest as much time as possible as making it round and puffy, because if it's a
square it's going to look just like a block, while the original is super smushy if you look at it. So
spend some time cutting the shape of the foam as you please and now… are you ready? one! two! three! i just needed to go around and jump on the couch and
make myself super comfortable to test how soft it is. oh my god! it's so awesome! now i'm actually
jealous that i made it for someone else, and i wish i had it at home to jump on it all day.
And the coolest thing of all is that it's completely assemblable, you can assemble it as you want. i
don't know how to pronounce this word. but you can transform the couch in any possible way. if you change home, if you change the arrangement of your apartment, if you just want to spice up your space,
you can just transform it as you want and this is so cool. i literally love this project, i'm so
excited. please, guys, leave me in the comment down below; what you like, what you didn't like, what you would have done differently for me.
again i had never done any project like this one
and i was completely going blindfolded. Intuition i guess? ah i'm so happy. subscribe!.
As an Amazon Associate I earn from qualifying purchases.


