

As an Amazon Associate I earn from qualifying purchases.

okay so the weather is
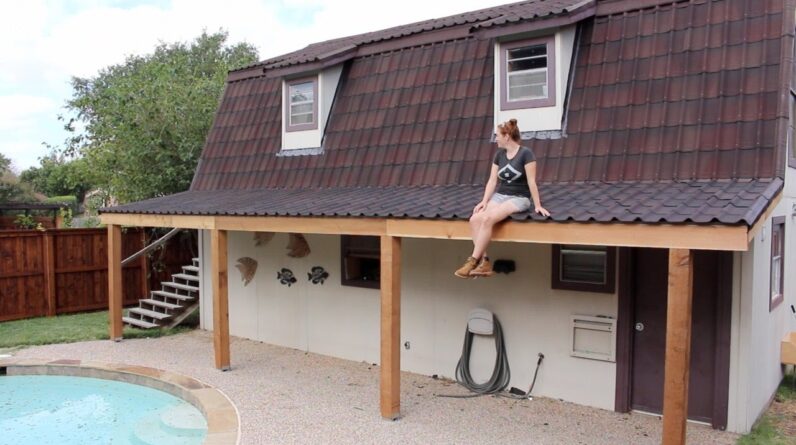
finally cooling off here in Texas I'm gonna take advantage of it we've been
wanting to put an awning here just for the barbecue pit and also just some
shaded general seating so that's what I'm going to do today I've never done
anything like this before but at this point I feel pretty confident that I'm
gonna be able to tackle this project so stick around if you want to see how I do
it did I do okay I first thought to make a new roof line going underneath this
one however very quickly decided that it would look much nicer if I were able to
tie into this existing roof line and just slightly change the pitch so in
order to do that I first had to tear off a few of the shingles the existing
fascia board a little bit of the decking as well as this 2×4 that was blocking
the end of the rafter tails and that way I have access to all of these rafter
tails so I can tie my new roof line into this existing one but that demo work
done I then started working on setting my pose and I first try to use my drill
on the hammer drill setting however this concrete is so difficult to get through
I ended up renting a corded hammer drill instead now it's kind of difficult to
see but I did pull a chalk line so that I could make sure that all four of my
post brackets were going to be in an absolute straight line where these
posters setting the ground is actually on a slight slope so what I ended up
having to do was set the post in place with it still long and then I would set
it at level and ask my husband to come and mark the top of the brackets and
this gave me the exact angle that I needed to cut the post at but with the
post being so thick and also it being an angled cut I couldn't use my circular
saw so I resorted to using a hand saw to make these cuts next I moved up to the
top so I can start working on cutting out the notch that will hold the 2 by 8
header I plan to use and to make this notch I use my circular saw just to make
multiple cuts in the area that I needed chipped out so that afterwards I could
use a hammer to break it all loose after breaking all of the pieces
as I came back with a chisel just to make the surface a little bit more
smooth then from there I was able to cut the post to its final height making
three cuts with the circular saw then having to finish it off with the Hansel
and that is one post complete so now I can set it in place and attach it to its
bracket I went to the bottom and attached it with so few screws and then
repeated the process for the other posts now of course the ground here is not
level so to make sure that all the posts come out to be the exact same height I
would set the two by eight header into place have one person hold the next post
plumb while another person held it up until it was perfectly level then the
post could be marked taken down then I could repeat the process by cutting the
angled bottom the notch out the top for the two by eight and then cutting it to
its final height and attaching it the existing roofline of the shop actually
extends past the two outside most posts so whenever it came time to installing
the 2 by 8 header what I did was set it in place and line it up to be in the
center of these second pose and then leave all of the excess hanging off that
first post then for the remaining headers I would just take a measurement
from the center of one post to the center of the next making sure to check
for plumb on these posts before setting the screws at this point I was only
worried about making sure the posts were parallel to one another all right and
then it was on to installing the rafters I am changing the pitch slightly because
the existing roofline would end up way too steep I went with a 212 pitch which
is just fine for the shingle material that I'm going with now this is the
point where I was checking for plumb on the inside of the post to make sure that
they were parallel with the building and I could attach it to the existing rafter
tails with two screws since I'm going with two by fours I did make these on 16
inch centers and I use some of those Simpsons strong type brackets to attach
them and let me tell you by the end of all of these rafters I was very worn out
and before you say it I did end up getting a smaller hammer that I could
manage a little bit easier now looking back on it this is the one thing that I
would change if I could instead of going with a 2×4 on the side most rafter I
guess I guess it's called the rake I ended up going with the 2 by 6 and I
wish I would have went with a 2 by 8 but I guess hindsight and all that what what
I did was cut into the roofline and then cut the 2 by 6 rate to the exact angle
and then just fit it into place and attached it now with the rake in place I
could now cut the 2 by 8 header to the exact link that I needed it okay framing
is done on to the decking so at this point I had the call and some help in
order to get those full sheets up there and of course it became much easier
after getting the very first sheet down but I would make sure that it would fall
on the center of a rafter and then use my pneumatic nailer to nail it all into
position I first did all of the full sheets along the back and then came back
and did all the partial pieces up front so when you're ducking you want to
stagger your joints so I intentionally cut this one a little bit shorter so
that it would not be on the same seam as this one all right moving right along now it was
time to lay down the paper a buddy mine had a roll of synthetic roofing paper so
he gave it to me for doing this job thank you buddy and instead of using
roofing nails I ended up using my slap stapler and this made very quick work
from putting this down and I make sure whenever I got to the back of the roof
line to put the existing paper over this paper then I came back and applied a
drip edge now the shingles on going with only required to repay along the front
edge so I did not have to apply a drip edge to either one of the sides all
right and now onto the shingling now the material I'm going with is made by a
company called on the lane and not only do I think that they are prettier than
conventional shingles but they're also more environmental friendly they are
made up of 50% recycled material that is infused with asphalt but they are just
as simple to install as conventional shingles I started off by preparing what
will be my starter Rousch angles and for these the company makes these foam
inserts just to prevent insects or birds from getting into those corrugations and
to make installing them simple I applied a little bit of spray adhesive just to
keep them in place while I'm moving around the shingles but then I moved
them all to the roof and started installing them now for the very first
shingle you do have to install an additional piece of foam and that very
last corrugation just because another another shingle is not going to be
overlapping it so I set it in place measured out my overhang which in my
case I wanted an inch and a half and then put in a screw then I went to the
opposite in the shingle not going to the very last corrugations
since another shingle will have to be overlapping it which of the second-last
corrugation and also put in a screw after measuring the overhang was the
same then I can fill in the remaining corrugations in between so my back porch
is that direction so by starting the shingling on this side all of the
overlapping seams are going to be on this side of the corrugation so that
whenever you look down the roof line from the back porch you're not going to
be able to see them as you can see they overlap very simply
and then it's just a matter of repeating the process putting in the first screw
the second-to-last screw and then filling it in when it came time to start
the second row I used a box blade with a hook on the end in order to cut off one
corrugation and this is just to stagger the seams of the shingles now since my
roofing paper doesn't have any marks I just measured the reveal of that first
row of shingles in order to line up the second then since I was already on this
side I went ahead and cut and installed the remaining shingles so that I could
work all the way to the back of the roof line and fill it in completely so this
is called an apron piece and it's going to transition from these two angles so
I'm going to take the flat portion and work it under this then I'm going to
have to cut this back row to be a shorter tile I'm going to be working it
under this apron piece and then of course over this piece all in all I was
super impressed with how simple and easy it was to install it took me right over
three hours to install at all which I don't think is bad considering I don't
move for a living if you want more information about these shingles then it
will leave you links in the description of the video it's pretty impressive
stuff after getting all of the shingles installed and moved on to what they call
the verge pieces which is just the pieces that go along the edge to not
only give it a completed look but also these are the pieces that take the place
of needing to install a drip edge along the rake all right and that's actually
where I'm gonna have to stop for this week however next week in part 2 I'm
gonna be doing the decking for the underside running some lights as well as
finishing off the post so stay tuned if you are interested of course I would
love to hear what you think about my project so far in the comments section
so stay tuned for part two I'll see you soon you're the coolest yeah I appreciate it
uh-huh all right now just bring that on up here
now bring out all up here now

As an Amazon Associate I earn from qualifying purchases.


