

As an Amazon Associate I earn from qualifying purchases.

Hello beautiful people welcome back
again to my channel my name is Nora G. and today I will show you how to
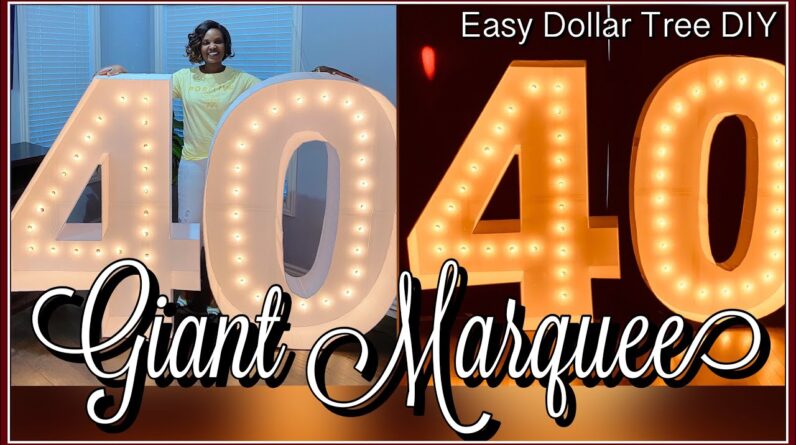
make marquee numbers with lights using foam boards from the Dollar Tree making
this a Dollar Tree DIY birthday décor. Okay so as you can see I already lined up my foam
boards from the dollar tree and uh before we dig right into this I would love it if you can
hit that subscribe button if you're new here and for my returning subscribers thank you so
much for coming back. So now let's continue – so for this giant marquee numbers I will be doing
5 foot tall numbers and here I have a PDF of the numbers that I will actually have taped onto the
foam boards that I have lined up on the floor. I wanted this to be exact so I actually went ahead
to create this on my desktop and made it out in a puzzle format for easy printing and for exact size
so if you're looking to doing this DIY sometime and you're in need of these numbers you can reach
out to me via my email found in the description box and then I'll be sure to provide you with
the PDF of any number from zero to nine okay. So now let's continue I'll be using this x-acto
knife there I will link that in the description box as well and my ruler to actually cut
out the numbers just watch as I do this. I don't know if you noticed but before cutting
I'm doing this I actually taped down this puzzle number onto the board to make sure that it doesn't
move when I am actually doing this so make sure to tape it down firmly before going ahead to trace
out the lines okay I'm not cutting out deeply just yet I'm just making sure I am marking
the spots where I will be cutting on later on so after tracing it with my x-act
knife I use the pencil to actually really print it out clearly before I will go ahead
to cut it out just what you said complete this so in case you're wondering why I am making
a large or giant 40 number out of nowhere today is actually my twin-in-law's birthday
yeah there's such a thing as twin-in-law so my sisters in law – they're twins, today is
their 4.0 birthday and I thought to do this as part of the décor and here we go so this
is the whole reason so please do wish them happy birthday for me in the comment
section I'm very sure they'll be on here reading and would definitely appreciate that
as well so yes so just type happy birthday Lem and Pih and they'll be sure to receive it thank
you so much you all are amazing.
They are my absolute favorite I know I'm gonna get into
trouble for saying this but yeah so please do wish them a happy birthday for me and many more
glorious and blessed years ahead for them okay so back to our DIY marquee numbers – giant marquee
numbers for my twin-in-laws yeah I like that term, anyway so if you noticed I actually used a cutting
board to cut out the numbers as you can just see right now because I have a wooden floor and
I would not recommend you using x-acto knife over that you'd be basically going to destroy
your floor okay so make sure to use a cutting board or any other thing that is solid that
couldn't cut through underneath your foam board so now that I have cut out my number four um it's
about building the frame work that will go around the number four so I measured seven inches using
my ruler and then used the the templates that I just basically made to cut out the rest of the
foam board oh but by the way as you can see I am using my cardboard cutter or my electric cutter a
battery operated I'm sorry not battery – cordless cutter because you get to charge this and I have
that linked in the description box so make sure to check out my Amazon storefront I have linked
everything that I use in my videos on there so under the Nora's DIY & Crafts essentials
you'll be able to find this and many more.
So now that I am done cutting out the framework it
is time for me to glue that onto my marquee number four okay so I will be cutting accordingly
I'm measuring and cutting accordingly as I go so starting from the inside out because if
you do the outside before the inside you may end up damaging your framework so make sure to do the
inside part of any number not just the number four before you do the outside part of this okay so I'm
using my hot glue because hot glue and foam board are like five and six they glue very well okay and
it's quick too so just watch as I complete this keep in mind that you have to be very precise
with your measurements and your cutting if you want to have a nicely shaped number
four and a perfectly cut number four okay or any number for that matter so make sure
to use your ruler and measure accordingly this is a very budget friendly giant DIY marquee
numbers using foam boards because ideally this is made out of wood and it is way heavier and
costs more to actually do that but believe you me when I say that this only cost me 20 dollars from
buying the foam boards and basically the hot glue and then I will be adding the lights which was
the most expensive of them all but the lighting is optional because you have another option to fill
these numbers – marquee numbers with balloons. Even with the lighting this is not as costly as
as compared to you wanting to buy marquee letters so if you can do it yourself go right ahead and do
just like I am currently doing okay.

These things cost no less than eight hundred dollars I'm not
even kidding you uh a 5 feet marquee letter/number but then again they're not using foam boards even
for the foam boards versions that are sold they're not sold for less than 300 – 400 alright so I
really do hope that this video does show you how to make marquee numbers with lights and using foam
boards for an easy and budget friendly option. Are you still watching? Yes? well thank you so
much if you've watched right up to this point and so please do comment "Marquee" in the comment
section if you've watched this video right up to this point I really do appreciate you and
also do not forget to hit that like button if you've enjoyed this video
so far. Now let's continue now at this point our marquee number four
is ready for use if you're looking to just filling this up with some balloons and
have no interest in using any light bulbs however this girl right here likes to go a little
bit extra so I am actually marking the areas where I will be inserting the light bulbs um then
I will set this aside and we'll move on to doing our number zero so just watch as I do this and
then on to the next which is marquee number zero now it's time for us to do our marquee number
zero also five foot tall just as the number four Just like with the previous I am laying down my
foam board again make sure to use white duct tape it just makes common sense to do so okay because
you're keeping it all white and we're not actually going to be painting over this all right and
also in total I used 12 foam boards to cut out the numbers and then use the remnants and also the
rest of the foam boards to create the framework so overall I used 16 foam boards to create the
number 40.
And these are sold at the dollar store um and also you can find them on from
on Amazon which I am also going to link in the description box below if
you're looking to buy in bulk so as opposed to printing it out with a pencil
like I did the last time with the number four before cutting it out I am doing a different
style with this one so I am cutting it directly after I had taped it onto the foam
board so I am using my exacto knife to actually cut out the circle without
tracing it out anymore mainly because zero is easier to cut out compared compared to
any other number so um I recommend you choose which one is best for you I found both styles um
okay to use but I think this option was way faster than the option that I used for the
number four just watch as I do this okay so just like with number four I think I
regulate the crown rules for how to continue with building the framework for this starting from
the inside to outside however the difference here now is this number zero is curvy and so what I am
doing right now is making the foam board flexible so I can actually make it um make it go around the
number zero all right it is not like straight cut like a number four so make sure to do
this measuring it out in two inches apart before placing it over your number
zero just watch as I do this so once I have all of the framework
put together for the number zero I just like with the number four I will go
ahead and mark uh the areas where I will be inserting the bulbs which will be the
last thing that we will be doing so next after this will be inserting the bulbs into
the lights so just watch as I complete this again just a quick reminder if you're looking to
getting some marquee numbers or letters actually a to z 0 to 9 in pdf format possible format that you
can use to do your own DIY you can reach me at my email and I will give you a quote for each letter
and word if you're looking to spelling out a full word make sure to contact me at my email linked
below now that our number four is all set it's time for me to insert the bulbs so I got this
amazing 25 string lights 25 bulb string lights from amazon which I have also linked below you can
find this at my amazon storefront so make sure to check that in the link below I will go ahead to
insert this onto our number 40 but before I do so I actually use the tip of the bulb to mark out
exactly how much um how wide the circles will be like the holes will be through which I will be
inserting the bulbs so just watch as I do this so just to reiterate just like you'd seen me
done before using my ruler I made sure that the space in between each bulb is exact because you
want to keep it the same and also very straight so make sure to use a ruler to map
out the distance between each hole for a more professional look okay
so you just do not want to do at randomly because that is not going to
look good when you have the lights all lit up one thing I love about my key numbers is that
they make such a statement so this DIY giant five foot marquee number four and zero would
definitely make a statement for any kind of décor not just number four and zero but any number
this large would definitely make a statement for your party birthday you name it okay it could be
letters could be numbers so make sure to add this to your foam board DIY projects and also your DIY
dollar tree birthday décor they're super easy to make even though yes it could be time consuming
well it didn't take me very long but you have to have some amount of patience to be able to do
this all right but at the end you will enjoy this so once I had everything all set if you did notice
I used some duct tape to hold down the cable on the back and now I am actually inserting the
bulbs to where they belong just watch as I do this again for all items used in this video and my
other DIY videos make sure to check out my amazon storefront linked in the description box below
now for the number zero I actually tried another method to insert the box so I would I didn't wait
to put all the back ends before inserting the bulb at the front so and also I did not make the
holes as wide as I did for the number four all right so I'm actually just putting in the
back the socket if that's what that is called and then I'm doing the bulb right away and that
actually held firm without me having to use any duct tape for this option so i would recommend you
go with this option just because it is way faster and much more convenient and now this is our final
look for our giant DIY 5 feet marquee number 40. just to give you some perspective I am tall okay
I am like five foot nine all right so this is how tall this number 40 is it is gigantic and that is
it with the lights on and light steam I just love this makes such a huge statement please do let
me know in the comments section what you think about this particular DIY and also please don't
forget to hit that like button if you did enjoy this video hit that subscribe button as well and
turn a notification so you do not miss a thing in the meantime always remember to be your
fun self no matter what life throws at you! so you
As an Amazon Associate I earn from qualifying purchases.


