

As an Amazon Associate I earn from qualifying purchases.

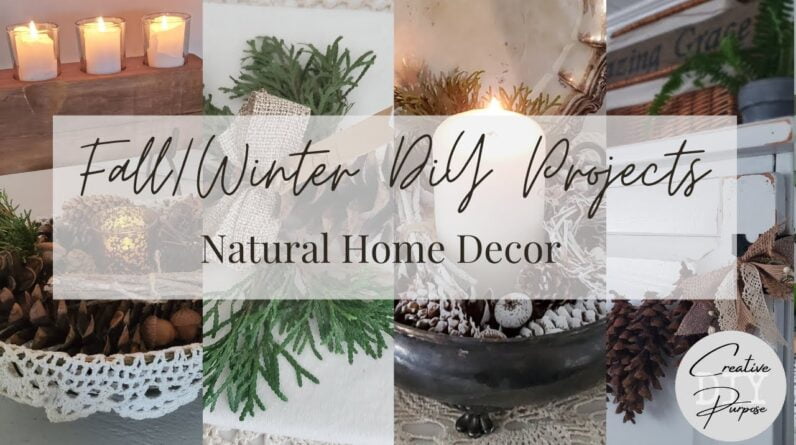
– Today's DIY projects are pine
cones and natural elements. Hey, guys! This is Kim from Creative DIY Purpose, and a welcome to my channel. If you're returning, welcome back friends and family. I'm so glad that you're here. And if it's your first time, thank you so much for joining me. So my channel is all about upcycling, thrift flips, thrift hauls, valuing beautiful vintage treasures, and doing any type of creative activity and trying to always use
what we have on hand first. Today, we are going to hop
right into our projects, and our first decor project is these cute pine cone name tags. And they are just so simple to make. And they're wonderful at a place setting or as a gift topper, and then your recipient
can hang them on the tree as an ornament. Okay. So what I did was cut
out about 18 to 20 inches of jute twine, but you can use whatever
ribbon that you have on hand.
And I just tied a slip knot through these cute, little cardstock flags that I picked up from JOANN
Fabrics a few years ago. You can use whatever
cardstock tags that you want. You can even design some
in Canva and print them out on cardstock, and you can put different sayings on them. All right. So your next step is to take some ribbon. I did about 11 inches of
this little burlap ribbon, and I just folded it
evenly in a Z shape, and… Backwards Z. And then you're gonna just
pinch that center together. And what I did was just tied it, the tag, through.
I did a little slip knot and then just fix the bow so that one tail's in the back and one is in the front. And then you can cut your edges
however you wanna do them. And then you can just
fix your cardstock tag to go the way that you want it to go. And then we're gonna go right ahead and just tie it right on
the top of this pine cone. Okay. So I'm gonna give you two tips on a few mistakes that I've made. Before you tie this on, make sure that the pine cone is sitting in a stable position because what I've done before is gone and tied this on and had
it go head over teakettle. So you just want to make sure. I always usually put it down on the table, and roll it, and see where it stops. There we go.
(laughs) All right. And my other tip is, if you're gonna do a bunch of them, like for a place setting, make sure that you're tying at either the beginning of the pine cone or the end. Otherwise, when you put them on a place setting, they'll be mix-matched. These also sell really well. I sold quite a few online and when I had my retail store. And here they are as a gift topper with just some muslin
fabric and some greenery. (soft piano music) (piano music intensifies) Okay. Moving on to project number two. It's a pine cone garland, so you're gonna want to decide how long you want your garland. This one, I am doing four foot of garland with a foot of the jute
twine on either side to give me enough room to add a bow and to tie it on. And I used 15 of the
eastern white pine cones. So again, it's gonna depend on
the size of your cones. And then I cut out the jute twine, cut up 15 strips of that in six inches.
Now, if you have trouble seeing or tying on things that are that small, definitely make them longer. It was a little bit of a challenge, but… And then just go through and tie them on. And then in the end, when you
have them all in position, you can go ahead and
tie a knot on either end so that they don't slide back and forth. But I always wait 'til the end because what you're going
to want to do, as well, is cut off any of the extra
twine that's up on top.
And that's what I'm gonna get ready to do once I get them into place. And then any of the
remaining twine that's left after you cut it, you can just tuck it
under one of the scales of the pine cones. All right. So I'm gonna make a bow. I just took some of this burlap, and I actually did spray
the edges of this burlap with a sealer because I
didn't want the edges to fray.

I do sometimes use the liquid no-fray, and that works really well. So I'm just adding some
burlap and some lace. And I'm gonna go ahead
and try to form a bow. Just going to fold it back and forth, like accordion style. Make sure that everything's
positioned in there. And at this point, you can
use a little dab of hot glue. I just wrap that twine around
to make the center of the bow. And we were good to go (soft guitar music) For project number three, we have a natural bowl filler. And you can use any all-natural elements that you can find outside.
We used a variety of pine cones and other tree cones, acorns. We even took some small
twigs that came off of our pine trees and cut them and actually put them in
like a little twig bundle. And of course some acorns. And you just arrange it in a little dish and add a candle, and it just makes a
beautiful table centerpiece. Oh, and I did add a little wreathe that I made out of
grapevines a few years ago. (instrumental jazz music) And project number four is my favorite. It is painting the bowl filler to be snow kissed. And all you do is take white chalk paint, and you're just gonna go along the edges, almost, like, dry brush it on. And you don't want to
get too much on there 'cause you want to have
that gorgeous contrast of that all-natural, beautiful brown with just the touch of the white, just to give it a pop. So all the projects that
you're seeing today, I have actually sold online and in my retail store when I had it, and the snow-kissed by far, anything, whether it's a snow-kissed garland or the name tags, that is a best seller.
Now you're gonna wanna add two coats if your pine cones are really dry. And sometimes that happens
just from over baking them. And I will talk about how to
clean them and prepare them for crafting at the end of this video. And in the next few weeks, I will show you how I made this
beautiful table centerpiece, just outta all-natural elements. So be sure to click that subscribe button so you don't miss it. (soft music) (cheerful music) And another option is to
fully paint your cones. Now because pine cones do
close up when they are wet, sometimes, especially with
the eastern white pine cones, it's really hard to dip them in paint 'cause they'll close up, so I recommend spray painting them. And they've definitely gotta
cure and dry for several weeks or else you'll have that smell. And again, if your pine cones are super dry, the more coats it's gonna take. So let's roll right into
how we prep our tree cones for crafting. All right. So we're gonna head outside and see what we can find for pine cones.
Show you guys how we pick some of 'em. And these are almost
like a Easter egg hunt. They're usually just hiding right on the surface, underneath a leaf. And you see how some of
'em are damp and wet, and the scales are closed. We found a frog; the kids found a frog.
(kids chatting) Isn't he beautiful? All right. So we picked up some of the smaller ones. Now we're gonna head over to our side yard and see what we can find. On the other side of
those trees are the river. It's kind of like a
drop-off and the river, so we'll come over here on this side and try to find our oak tree so we can just pick up some acorns. We don't wanna take 'em all 'cause the squirrels
find them and eat them. All right. All right. So here we find something else. See this sticky sap. And that's sap, huh? I shouldn't even be picking these up without gloves on because the sap is so super sticky. So we recommend wearing gloves, and you're going to brush
out all of those pine needles and leave them in the
sun or someplace warm so their scales open up and
they're easier to clean.
Then once you've done that, you wanna lay out some parchment paper, either on a cookie sheet or in the oven, and you're going to bake them
around 200 to 225 degrees for roughly around an hour. You don't want to over bake them because they will become
too dry and brittle. And you also want to be careful because the sap is flammable, so you wanna keep that
away from your element, but your home will smell amazing. And once they cool, they are ready for crafting. Friends, I wanna thank you so much
for joining me today. I hope that you enjoyed this video, and do you guys have pine
cones where you live? Do you craft with them? Just let me know below, and I will see you next week, and God bless. (leaves rustling) And that's sap, huh? – [Child] Yes. (leaves rustling) [Child] This one would
make a nice Christmas.
– [Kim] Yup. (children talking) (child singing).
As an Amazon Associate I earn from qualifying purchases.


