

As an Amazon Associate I earn from qualifying purchases.

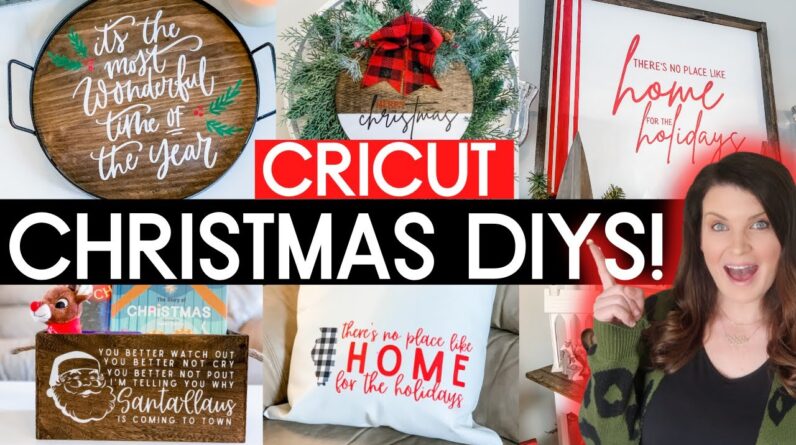
hey friends welcome back to whiskey and whit
i'm whitney and in today's video I am sharing with you a ton of beginner-friendly projects
for DIY decor for Christmas using your Cricut a ton of you have commented on recent videos
asking for more tips and tricks when it comes to cricut so i am so happy to deliver a huge thank
you to cricut for partnering with me on today's video so i can share a ton of tips and tricks with
you guys so you can break out your cricut and diy for the holidays the first project we're gonna
do is this super cute door hanger these have been all over the place on every social media
platform but i wanted to show you how easy it is to make with your cricut as i go through
my projects i'm gonna share with you in the bottom left-hand corner the products that i
use as far as the vinyl and i will let you know kind of best use cases for each of those so
for this particular one i'm using removable vinyl so this door hanger started out with a sign from
hobby lobby it's actually a wood pile cut out of a baseball but it ended up being so cheap with
the 40 off coupon and the back is completely bare i decided to take some stain to it my favorite
dark walnut and i covered the entire back as well as the edges to give myself a really nice base to
work from then to create the dual tone look i took some painters tape and some white waverly chalk
paint i just eyeballed it i didn't really measure where i put it i just wanted it to be not exactly
in the center i wanted to be a little bit off then i gave it two coats including the sides and
measured how big i wanted my decal to be i usually measure the area and then subtract about an inch
just to give yourself breathing room around the outside then it was time to get my item ready and
qriket design space file i'm using today will be linked down below for you to use for free you can
grab the download and here i'm using the contour tool to cut out what i want to be in different
colors so you're going to click the contour tool down in the right and select the parts of the
words that you want to cut out and then you are going to duplicate it and select the items that
you want to cut out in a different color so here it allowed me to make the mary be cut out on red
vinyl and the christmas to be on black tell it what color you want the letter to be they let you
know which matte to load which is super helpful now i'm using removable vinyl and black and red
for this particular sign you could definitely also use permanent vinyl and both of those are
terms for sticky vinyls because this sign is for inside my house i'm not super worried that it
is removable vinyl but if it's outside you're going to want to make sure you seal it and
also i would suggest using permanent vinyl and then i applied both of my pieces to my sign i finished off the look with two 98 picks from
walmart their picks are amazing this year and a great price and then i added a cute little red
buffalo check bow this ribbon is also from walmart and i finished off the sign by adding a ton
of hot glue to the back and glued some jute twine to hang it because the sign is so
thin it is going to hang just fine with one piece of jute twine and the hot glue if
you've got a heavier sign you're going to want to give it something more substantial
you could staple something in the back etc i added this to my faux cedar wreath i got
from walmart this year it adds some really nice color to our gallery wall and i love that
you could use this for a ton of different things another way i love to use removable vinyl is to
create a wall or mirror decal this does not leave residue and it makes it really easy to switch
out things per season for this particular area i cut out oh come let us adore him christ the lord
for above our nativity set in our living room so i loaded up the same black removable vinyl and i
cut out my free cut file that i will link for you down below i made sure to measure my mirror and
i ended up needing it to be 24 inches but you're going to want to measure wherever you're putting
it so then that way it fits your space correctly then i added my transfer tape to both images
and then i went over to my mirror i would also suggest it's not shown here but cleaning off your
mirror before you put the stuff on and allow it to fully dry if you use windex or something to
make sure you have the best stick i really love how it changed our plane mirror above this area
to a really fun themed area i also like that it takes the true meaning of christmas and makes
it stand out a little bit more in our house up next we're going to grab
some permanent vinyl and i'm going to show you how i created this
santa claus as coming to town crate so i started with a pre-finished pre-stained crate
from michaels just for the sake of saving time you can use whatever container you have you could
also thrift a container but the first step is to measure how big you need to make a stencil
so here i'm measuring it is about 12 inches wide and i'm gonna go ahead and subtract two
inches so then that way i have a pretty good border around the outside now if you do go ahead
and get a crate that is pre-done and you're not staining it yourself it may not want to take
the vinyl as well so what i like to do is go through and just rough it up with a 100 120 grit
sandpaper and that's going to make it a little bit rougher so it takes your decal a lot nicer
then i cut out my little decal exactly how i did the other ones you just go in upload it
decide what size it is and cut it out and then i went through and weeded all the little
pieces the santa face is pretty intricate so it took a couple minutes and if you have
large pieces that you're worried about kind of sticking to other things you can just go
ahead and cut it i like to section off as i weed then i took my decal lined it up straight made
sure that i pressed it down without any bubbles and voila it was so easy to put the stencil
on there and i love that i can use this for both decor and also the purpose that i
wanted to so i added some books and a little rudolph i'm gonna also add some pjs
for a really fun christmas eve box for finn all the books in the crate did come from walmart
all super affordable and the little rudolph came from target so i will link it down below if you're
looking for something like that for your littles this next one we're making this really cute tray
and this one is back to the removable vinyl but we're actually gonna paint so this tray i actually
found in the unfinished wood area at hobby lobby and i was so excited to find it i went looking for
that round for the first sign and this was such a great find here's the dimensions and the upc if
you're looking for this it was 15 but i use the 40 off coupon the first step was to disassemble so
i could really work with the piece of wood it came out really easily with just a screwdriver and then
i grabbed that same dark walnut stain and stained it exactly the same way that i did that first sign
i like to use the same stain throughout my house so then things tend to match so then to create
our stencil we're gonna head over to design space you're gonna go over to upload and select the file
now this particular one is not gonna be a free cut file because i purchased this off etsy i will
link it down below i really like to design my own but i am also in the realm of if it's quicker
to purchase it and support another creator i will definitely do that as well so i downloaded this
file and i uploaded it into the system now what i want to do is create a circle stencil so i'm
going to insert a circle shape and i'm going to size it to 11 and a half inches wide that is the
size of my tray so whatever you're using you're going to want to measure it and then i sent it
to the back and i put my image over the top of it this allows me to get it to the right size that
i want and it also allows me to create a stencil when both your circle and your text are selected
you're going to go up to the top and hit align center then that way you know it is precisely
in the center when it cuts then with both things still selected down the right hand corner click
slice and that's going to cut it out for you so that you have your outer circle as well as your
words cut out in the center that's gonna create three different pieces on my canvas and i'm gonna
get rid of everything but the circle that will leave you with your right sized decal stencil
and then you can just go ahead and cut it out follow your prompts on your computer load up your
vinyl and it will cut out for you then you're gonna go through and weed backwards from what we
did before so instead of taking out the outside you're gonna take out where the letters are and
then that is going to create a stencil be careful to leave in the little pieces that are the insides
of s's e's o's etc or you won't have the letters you're looking for then i applied some transfer
tape peeled off the back and then i applied it because my stencil is the size of the circle it
makes it really easy to make sure it's centered then i went through and gave the entire thing
a thin coat of mod podge thin is key here you don't want it getting underneath and then i went
through with some disposable makeup sponges and dabbed both the green red and the white paint to
create the look i was going for i ended up needing two coats just so then that way i had the vibrance
of the colors pop off from the dark wood stain once i was done painting i let it dry just a
little bit but it doesn't need to fully dry and i peeled off my stencil you're going to want to
give it a little bit of off but also be careful so you don't rip off the stain finish on your wood
and then my final step was to cover it with some dishwasher safe mod podge i am going to use this
just as decor but just to be safe i wanted to make sure it was sealed in case we put a drink on it
or something then i added it back to the frame and here is what it looks like i have made a lot
of different trays over the years and this has to be one of my favorites it's a great size this
would be super cute in a kitchen or a guest room and it has found its own little home right
on our coffee table in our living room continuing on the stencil train we are going to
go big and create this huge home for the holiday sign so here is all the information that you will
need for the different cut pieces we are doing a pre-sanded piece of plywood cut down as well some
one by twos for the border if you don't have the power tools to make these cuts yourself you could
definitely cut the outside pieces with a miter box or you could go to lowe's home depot wherever and
have them cut it for you then when everything gets home you're going to want to make sure you give
it a good sand and then we're going to paint our background white to give us a good base to create
the stripes on the sign i started by putting one piece of tape flush with the edge then a little
piece of tape as a spacer and then another full piece to paint that stripe then i ended up moving
the strips and kind of just eyeballed the two smaller ones you could definitely measure it out
if you're not an eyeballer but i figured because the tapes were straight lines and i was working
with a straight surface i could just wing it i followed the same little formula for the bottom to
create three more lines that overlap so for this large sign our surface area for the decal is way
larger than your cricut mat so i'm going to show you how you can create a stencil and kind of weave
it together on top of your sign to get that large area of coverage you're going to import your file
and use the same contour trick i showed you before to get there's no place like home in one
section and then for the holidays in another so i measured my sign and decided that i needed
a decal that was 17 and a half inches by 17 and a half inches so i made that size of a square in
design space so i could line up my two pieces and i knew that they would be the right size instead
of trying to guess how wide each piece needed to be just put it on your square and it will help
you figure out what size it needs to be then once it was all cut out on that removable vinyl
again for a stencil i went through and weeded out the stencil and then added some transfer
tape to put it on to my sign i ended up making a silly mistake here and not cutting the contour
underneath home i just cut out the pieces for holiday so i had to do some extra work don't do
this definitely trim out around each word so that where they're intertwining you have the space so
that the stencil can just be stuck down if you do it the right way it will be a lot less complicated
than how i did this it ended up turning out just fine but i gave myself a few extra steps for this
one we're going to follow the same process that we did with the tray so start with your mod podge and
then take your makeup sponge and put your desired color onto your stencils and then go ahead and
peel it off and then because i made that silly mistake i just had to do the top and take it off
but if you do it correctly and not like how i did it for this particular one you'll just have
one big stencil and you can do it all at once another trick i like to do is keep painters
tape on hand so if you have little areas like the tops of the l or the d that you think you
may accidentally like overlap on your stencil then you can definitely go through and put the
tape down so then that way you aren't going to chance like getting that all on your pretty
white sign once you peel up your stencil if you have any areas with some imperfections i just went
through and covered it with some white chalk paint the last step here is to take your borders and
these i stained with my dark walnut by minwax stain and i lined everything up the thing here is
that you're gonna have a one inch overlap for the two sides so then that way you make a full frame
then i just grabbed my nail gun but you could use some brad nails and a hammer if you didn't
have the nail gun but i absolutely recommend the snail gun i use it all the time and i added
the top and the bottom first because those are flush with the sign and then i added the
two sides if you're looking to hang your sign i'm just going to set it up but you can grab
a little sawtooth hangers and that's how i recommend putting it on the wall i absolutely
love this sign i made this for my mom she's got an area in their house that could really use
a huge sign like this so i'm really excited to give it to her i had to put it up in my house
to style it and i had a couple minutes where i was like oh i should keep this but then i decided
it will definitely go to a good home these large signs easily sell for 75 plus and so you can
make them for a lot cheaper with your cricut and finally we are going to make some really
fun pillow covers and this time we're going to use cricut's infusible ink so the cool thing
about this is that the pigments actually go in to the fabric versus sitting on top like a
heat transfer vinyl so i went through on design space and sized up everything i had one situation
where i had to cut the word griswold in half on in a world full of grinches be a griswold because it
was too wide for my mat so i went through and did the exact same process that i did for the sign
to get everything in the right size to cut out and then i used the infusible ink sheets to cut
everything out now for these you're going to do the same thing that you do for heat transfer
vinyl so you're going to put the shiny side down as far as your machine settings you can select
custom and then tell your computer it's an infusible ink carrier sheet and then also make
sure that you mirror the image because you are going to then infuse it onto the fabric backwards
once i got everything cut out it was time to weed it so this is definitely not like a vinyl
material it's more like a card stock so things may rip as you go and you can pop out the inner
pieces of letters a lot easier than you can vinyl you don't have to really like scoop it up
or pick it out you just pop it off and it just comes unstuck now here you can tell how it looks
a little bit more like paper than it does a vinyl but it doesn't look super pretty pulling it
off but once you get it off it works great then i'm using my qriket easy press 2 to transfer
these to my items my settings are 385 for 40 seconds but you could definitely use an iron
for this as well then i took out my cricut little pillow covers and first i used my easy press
to just press out any of the creases in there then i made sure to get off any little lint pieces
and then i lined up my sheet now this backing is sticky so it's nice that you can kind of
stick it down if it moves around a lot you can use some heat resistant tape to make it stay
definitely don't put regular tape because it will melt and it will ruin your project
but heat resistant tape will work great then i went through and pressed each area
for the full amount the 40 seconds for my red pieces and then also my two red and black
buffalo check pieces for the last name griswold i absolutely love how this
turned out with the buffalo check and then to finish it off you can either throw
in a pillow you already have or an insert or i just pulled apart some old pillows i was
getting rid of anyway and used that stuffing to just stuff the pillow i absolutely love this
saying you guys know i love christmas vacation and i was inspired to do this by nicole over
at the week's nest she recently did a really cute dollar tree diy sign and i will link that
video down below for you but i had to put that on something i also used some red and black buffalo
check infusible ink as well as the red again for there's no place like home for the holidays and
i did my little illinois cut out in buffalo check thank you so much for watching and a huge thank
you to cricut for partnering with me on today's video more information on the supplies i use also
my machine and any other faqs will all be linked down in the description below as well as other
videos that include a lot of other qriket tips and tricks you can keep on learning be sure to
hit the subscribe button if you haven't done so already so you don't miss any future whiskey and
what content including more christmas stuff coming your way thank you so much for watching
and i will catch you in the next one bye do do you
As an Amazon Associate I earn from qualifying purchases.


