

As an Amazon Associate I earn from qualifying purchases.

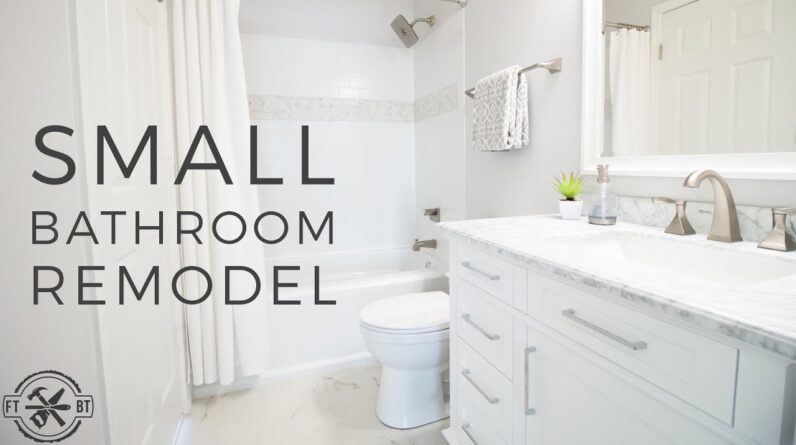
What's up guys, I'm Brad Rodriguez from Fix This Build That and today I'm going to show you how to remodel this small contractor basic bathroom and gave it a whole new look with a custom tiled shower surround in all new fixtures. Stay tuned I'll show you just how I did it. This is the small bathroom I'll be working on it's 6 foot by 5 foot, excluding the bathtub and has two doors in it to boot It was also the contractor basic package with bland flooring a sheet mirror generic lights in a basic shower So when my friends at the Home Depot challenged me to remodel a bathroom, I just jumped on the opportunity. I started pulling all the old fixtures out of the bathroom the toilet and vanity go relatively fast is they're just unfastened
But the mirror took a little bit of a finesse because it's glued to the wall We donated or sold all the old fixtures we could since they still work great Now, unfortunately, there's really no way to get a one-piece shower surround out of a bathroom without hacking it to bits I started removing the hardware and here's a little tip for the tub spouts Take a picture of the underside of the spout if you see a set screw.
It's likely a friction fit You just loosen that set screw and then pull the spout off if there's no set screw there It's a threaded fit and you just unscrew the spout After disconnecting the plumbing I used a nine inch wide strip of plywood to score a line around the walls above this round I used a smaller strip to outline the sides of this round as well Keeping clean lines here is going to help you down the road when it's time for new drywall With a hammer and a pry bar I remove the drywall around the surround to reveal the flange that's used to secure the shower to the wall studs beneath.
I checked behind the surround to make sure there is no wires or pipes and then I started cutting And you definitely want to wear a dust mask here while you're doing this The fiberglass is pretty nasty, but a sharp blade and a reciprocating saw makes quick work of the walls I couldn't quite get through the base of the tub though But I got it down to a small enough size where we could pull it out The last piece left was the floor I used a pry bar and pulled the flooring up which apparently wasn't attached very well because it came up really easily and we replaced the Flooring with a modern white large format tile and it really helps make a small bathroom feel bigger I made a whole video on replacing the floor so I won't cover that today, but you can go check out the full video There's a link below and at the end of the video with a clean slate It was time to start building the bathroom back up and we wanted to go with a bright Look to make this small space seem bigger and we also wanted custom touches to give the bathroom a high-end feel and The most involved upgrade was the Delta up style wall system and bathtub And the plumbing connections needed to be moved to fit the new tub, and I'd highly recommend using a licensed plumber for that.
I pre-drilled holes in the flanges for the install then I hooked up the drain and overflow connections on the tub And once these were set I secured the tub to the studs with panhead screws I used shims any place where the tub was a little off the studs to avoid cracking the flange Next up I did my first dry fit of the up style wall system we're using I put the back and left wall in a place to check for fitment and the right wall needs cutouts for the plumbing So I took measurements and I made cutouts for the spouts in the mixer valve The up style system is supported by furring strips on the wall Now one thing I'd have done differently if I did it again, though Is that add more vertical studs in there as well and make these 12 inches on center instead of 24 inches on center Which is what my bathroom has.
I think it's 16 inch studs though. You'd probably be okay the 24 inch on center Just gave a little more flex than I'd prefer after install And then I did one more dry fit of all the walls to make sure the furring strips are in the right place. I pre-drilled the flanges at the stud locations to make the install quick once the adhesive is put on as well The wall kit comes with double stick tape to help hold the wall to the furring strips while the adhesive sealant sets.
I used DAP 3.0 for the sealant which is one of the three recommended products specifically for this acrylic material Now a generous amount of adhesive is put onto each furring strip and then we brought the back wall in We held it in place making sure it was level to the marks that we made during the dry fit Then I secured it to the studs along the top flange and in this little screw recess in the accent tile channel. I pressed the rest of the wall firmly to the double sided tape and spread even pressure along the furring strips for good contact Before installing the wall with applying pipes in it I put on the fire retardant pad provided in the kid and cutout for the mixing valve.
I applied the sealant to the furring strips just like before and then I wedged the wall piece Then I secured the wall panel with screws and then I repeated the process for the left side the biggest thing to watch out for here is just to make sure that the sidewall Our tights in the back before you secure them so there aren't any gaps in the corners and everything should have been leveled during your dry fit and Hey if you're new here and like what you're seeing be sure to subscribe.
I hope to see you around in the comments As a final step to help the wall set up firmly I use some two by fours wedged against the tub to hold the bottom tight and left it all to set up for 24 hours The wall system has a nice subway tile look but what really sets it apart is the custom accent channel to add your own style We went with the hexagonal mosaic tile for this feature. I set up my tile saw and I used an extra floor tile clamped to the table as a zero clearance cutting surface Cutting a shallow line in the tile lets you see exactly where the cut will be And it also gives you support to cut small tiles which have a tendency to blow out and chip.
I Cut down the tiles to the right height of the accident opening and then I cut the pieces to size for the beginning and ends of the channel And the tile install is quite a bit different than normal tile install Regular mastic won't stick to the acrylic. So again here I had to use the special sealant So first I caulk the corners to make sure that they were Watertight and then I filled in that screw channel to seal the screws and also give a flat surface for the tiles After that, the sealant is applied just like the mastic and trialed with a v-notch trowel I pressed the mosaic strips into the adhesive and I use small spacers to keep it from sliding down And the adhesive holds it firmly to the wall so you don't need to worry about it falling off.
Just sliding down Now my biggest piece of advice here is to watch your edges on the top and bottom I first started out applying too much of the caulk and it was globbing up on the edges and then I wasn't putting enough on there And it wasn't quite sticking the small tiles in place There's a fine line between getting just the right amount of adhesion without getting a lot of squeeze out There was definitely a little finagling to do with the gaps right between where the strips meet up, but I smooth it all out best I could and let it sit for another 24 hours to cure Now the grounding stage is similar to other grouting the only thing you need to do here is mask off the surrounding areas I use some painters tape and some clear plastic to keep the grout from scratching the acrylic Then I mixed up some unsanded grout and I worked it into the mosaic tiles I did both of the sidewalls first and I came back and wiped off the excess grout With a sponge before it could dry too much and become difficult to remove Then I moved onto the back wall and I did the same process there After that I decided to remove the tape and work the grout joints a little bit around the edges I'm glad I did this because I definitely had some bleed over and working the joints now before they fully hardened Let me still shape them and correct any issues I dinished up for the day by buffing off as much of the grout haze as I could then I came back and got the rest Of it the next day The last piece to button up the shower surround was to caulk all the seams I taped off the seams with painters tape and I used a grout caulk to match the grout that I used for the accent strips It was a little messy on that right side.
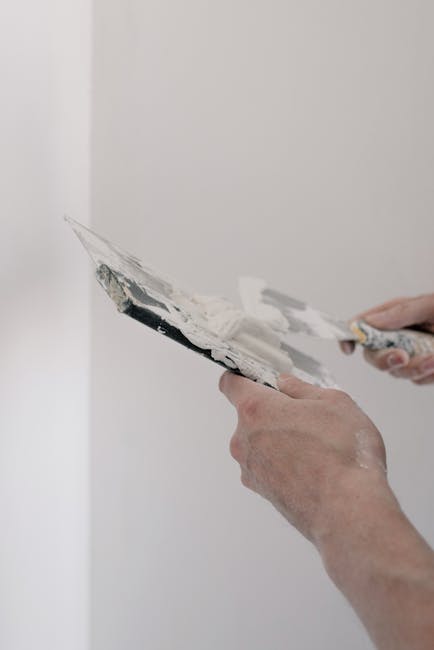
So on the left side, I went ahead and taped that seam as well For the acrylic seams I went back to the DAP 3.0 and caulked all the seams using my finger to smooth everything out and then removing the tape Honestly, though I'd look into the other two recommended cocks for this task because after a couple of weeks the DAP is already a dingy White and we haven't even used the shower yet And with the shower all buttoned up I moved on to repairing the drywall I covered up the back wall in the lower portions of the side wall with some straight drywall strips For the corners I cut l-shaped pieces out using my multi-tool The multi-tool is great for cutting odd shaped pieces and drywall and it really makes short work of it Using an l-shaped piece instead of two connecting straight pieces also makes mudding and blend in the corners much easier. I taped and applied my initial coat of drywall mud to the seams and the screw holes I'm not particularly good at drywall, but I make up for it by enjoying it even less In total, I did four coats of mud sanding between each one And one thing I've learned along the way is it's much better to do more light coats than to try to do fewer thicker coats Thick coats just take way too long to dry and is prone to shrinkage.
Nobody likes shrinkage Before installing the shower hardware, I turned over the painting to Susan and she knocked it out we put up a nice light gray that goes well with a simple modern look that we're going for I hung up the new light fixture to give us some better light and then I moved on back to the shower When I tried to install the mixing valve cover though, I realized the hole that I'd cut wasn't quite large enough I should have cut it much law to allow servicing the mixer valve But at this point I just wanted to open it up enough for the cover to fit So I used my rotary tool to widen the opening The fixtures I'm using are the Everly line from Delta We really liked their look and feel in the curves of the handles in The tub spout has this fun little twist to it That just gives it some great character and they both just screw on in our set in place I also added sealant on both pieces to avoid water leakage into the wall The showerhead was the last piece to be installed.
It definitely gives the shower a more custom feel also I finished off the renovation by installing a new Delta toilet a vanity with the everly style faucet and a mirror These are all easy to install in the upgraded versions We went with really transformed the look in the feel of this small bathroom now I'll have links in the description to all the items. I used in this remodel Hey, I got another video queued up for you just click right there It'll take you right over if you're not subscribed to the channel already I'd love to have you as part of the team and until next time guys get out there and build something awesome
As an Amazon Associate I earn from qualifying purchases.


