

As an Amazon Associate I earn from qualifying purchases.

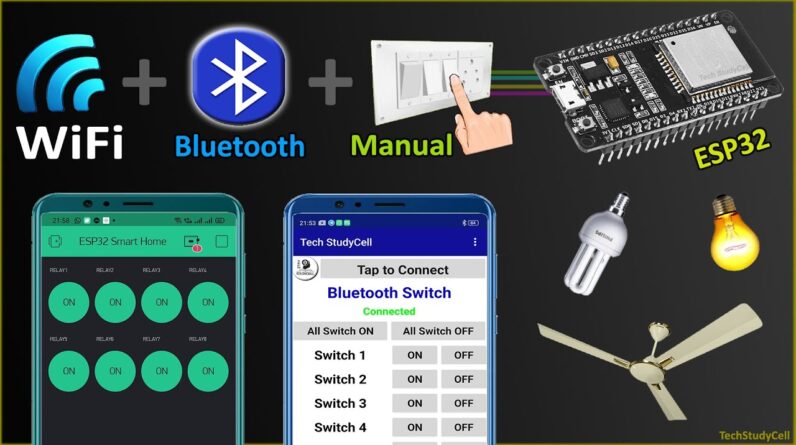
Hello, friends welcome to TechStudyCell. In this video, we will make a very useful
Home Automation project where you can control 8 home appliances with Bluetooth Wi-Fi and
from the manual switch. If Wi-Fi is connected with esp32, the blue
LED will turn on. Then you can control these 8 lamps with the
Blynk. And also from the manual switch, and you can
see you can monitor the real-time status in the Blynk app. Now, I will turn off the Wi-Fi and show you
how it works without the internet. You can see the blue LED automatically turns
off so now I can control it with the Bluetooth app and from the manual switch. So first I have to connect the esp32 with
this app and you can see it's showing connected. so I can easily control the lamp from these
buttons. and I can also turn off all the lamps with this button. Now I will control it from the manual switch
and you can see I can also control it from the manual switch.
Let me turn off all the lamps. now let me turn on the Wi-Fi again if the
Wi-Fi is available then esp32 will automatically connect with Wi-Fi and this blue LED will
turn on, then I can control the lamps with the Blynk app and also from the manual switch. And you can also use push-button instead of
this manual switch. So I will highly recommend you to watch the
complete video and during the video, I will share the complete circuit diagram the code
for this project, and all other details. So let's get started. [music] To make this home automation project you need
esp32, an 8 channel relay module, and to control the home appliance manually you can use your
existing switchboard. Now I have to connect all these components
as per this circuit diagram. As you can see there are a lot of connections,
so to make the circuit compact, I have designed a custom design PCB for this project and order
it from the jlcpcb.
You can easily order any custom design PCB
from jlcpcb with 3 simple steps. First, upload the Gerber file of the PCB,
then select the parameter like quantity, masking color. Then place the order. if you select a faster delivery service, then
you will receive the PCB within a week. and as you can see the quality of the PCB
is very premium in this affordable price range. so you can always try out JLCPCB for any custom
design PCB project.
These are the components required to make
the circuit on the PCB and after soldering all the components the PCB will be looked
like this. now I will connect the esp32 with the PCB.
before uploading the code I have to quickly configure the Blynk app for this project. You can download it from Google Play Store
or App Store. Now I will tap on "open", then tap on "new
project". give a project name "ESP32 automation". then select the "ESP32 Dev board" connection
type should be "Wi-Fi", then tap on "create". Now, Blynk will send the authentication Token
to your registered email id, which will be required in the code. now again I will tap on "ok". Now I have to add 8 buttons to control 8 relays
from the Blynk app. now I will tap on the first button. In the PIN, I will select virtual pin V1,
then to turn off the relay I have to send "1" and to turn on the relay I have to send
"0" as I am using an active low relay module.
MODE will be "switch". Thus, I have created our first button. In a similar way, I have to configure the
next 7 buttons with virtual pin V2, V3, V4, V5, V6, V7, and V8 to control the 8-channel
relay module with Blynk. Thus, you have to configure all the 8 buttons
in the Blynk app. Now we can move to the coding part of this
project. this is the code for this project, you can
download the code from the website "iotcircuithub.com", just visit the article and you can download
the code from this download button. Now before uploading the code you have to
download and install the esp32 board and after that, you are to install all these three libraries. I have already explained this in my previous
video I will share the link in the description and also in the "i" button. after installing all the libraries you have
to enter your Wi-Fi credential. Here you have to enter the authentication
token sent by the Blynk.

So I will go to the registered email ID and
copy the authentication token and paste it here. here you have to enter the Wi-Fi name and
the Wi-Fi password. if you refer to the same circuit then after
doing this many changes you can directly upload the code to the esp32 board. for that go to "Tools" select the "DOIT esp32
devkit V1" board and the proper PORT, then hit the upload button. when you see this type of "connecting……."
text, just a boot button and you can see the code started uploading again. I have connected these 8 lamps with the relay
module as per the circuit. and I will use this mobile charger to give
5 volts to esp32. now let me turn on the supply. now I will quickly install the "Bluetooth
switch" app which I will use for this project you can download it from the video description.
Then you can go to file manager, APK and this
is the app "Bluetooth_Switch_V1.apk". I will tab here and tap install. as I have not submitted this app to Google
Play Store so this notification will come I will tap "install anyway". then tap on "open". so this is the "Bluetooth switch" app will
control the relay module with this app after some time. as you can see the blue LED turns on which
indicate the ESP32 is connected with the Wi-Fi, so I can control it with the Blynk app. let
me show. you can see, I can easily turn the lamp on
and off with the Blynk app. now let me control it from the manual switch and you can see
the real-time status of each switch in the Blynk app. Let me turn off all the switches. now I will turn off the Wi-Fi and show you
how it works without internet. after turning off the Wi-Fi is a blue LED
automatically turns off. so I can control it with the manual switch
and from the Bluetooth app.
Let me connect the esp32 with the Bluetooth. for that have
to turn on the Bluetooth and pair the esp32. and I will tap on ESP32_BT and pair it. after pairing the esp32, I will go to the
"Bluetooth switch" app which you have just installed and tap on "tap to connect". then select "ESP32_BT", and it's showing connected. so I can control these lamps with this app.
so let me turn on all the lamps. All lamps turn on, let me turn off all the
lamps, all lamps turn off. I can also control the lamp individually with
these buttons. let me turn off the lamps. now let me control it from the manual switch
you can see I can also control the lamps from the manual switch if there is no internet. Let me turn on the Wi-Fi again, you can see
the blue LED automatically turns on which indicate now I can control it with the Blynk
app.
let me show you, and also from the switches. so this is a very useful project you can make
for your home. and if you like this home automation project. then please hit the like button and share
it with your friends. don't forget to subscribe for more such videos,
Thank you for watching. Have a great day..
As an Amazon Associate I earn from qualifying purchases.


