

As an Amazon Associate I earn from qualifying purchases.

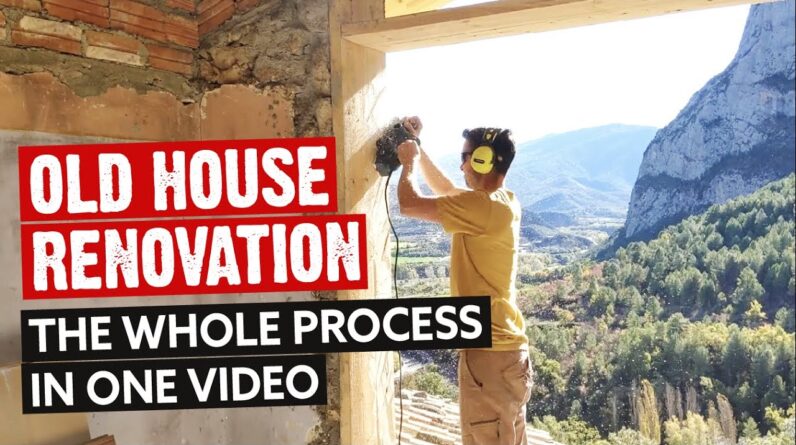
have you ever taken on a big project while not having a clue how you're actually going to do it [Music] this is a story of deep learning or stepping outside the comfort zone and working so hard for so long that it probably borders on some form of self-harm i'm nate murphy and after five years of travel and living in a van i wanted to make a home base in a good climbing area through friends i found a house that had been abandoned for over 20 years i managed to meet the owner we made a deal and i bought the house [Music] at the beginning i had no real experience with house building i had to learn everything from mixing cement to plumbing and electrics 14 months later i had turned the house from this into this [Music] the house barn and land was packed with old junk which was mostly useless i spent six weeks of non-stop work to clear it out so the first job is to clear out all of this hay it's actually quite a lot of hay and it's quite heavy so i've been going in this part of the barn found like a mummified cat got stuck in here this space is clean so all i've got to do now is shift this huge pile plastics and horrible rubbish uh metal these are all garden canes so to help get rid of some of the word and the bad word which is no value um having a pit fire so 36 hours of burn done bottles of the creepy room for the crucifix and the jesus pictures sort of slightly racy magazines here it is distilled down we have food stuff blinds mattresses chairs furniture linen so much linen um and then this is their personal effects so hopefully today is the last day of like just clearing stuff out of places i've got this little room to do like a store room on the outside of the house of course it's just it smells of wine fur or junk also extremely full of junk in here is a huge wide barrel but that'll probably stay so when we're tidying out i found these uh some preserve from 1998 and a few other jars i think it's really old tomato yeah this is automatic yeah i know you guys are probably pretty jealous but i would be jealous too if i didn't also own one of catalunya's biggest vintage jar collections so that is it the house is clear the house is swept the front is tidied up i engaged an architect we made plans in order to get permission then i went to the uk built a van for us to live in while i built the house and after six weeks i was back with permission in hand [Applause] the first stage was infrastructure [Music] i built a shower in the shed repair the barn floor built an outdoor kitchen so here we have it the dirt bag kitchen deluxe straight out and built some workbenches strong benches so this was the plan for the house first i would rip out all the non-load bearing internal walls then i would take off the roof reducing the house to four walls and two floors after this i would remove some of these walls and improve the floors first i demolished everything on the middle floor [Music] it's just a cloud of dust coming out of cisco's but i might see that always down and for the first time i can actually see the whole space i have but i'm cool [Music] next up was the top floor all the walls and ceilings had to be removed [Music] this was really disgusting work we have all of the roof struts apart from the one holding this tank but the tank's empty so it's fine ski mask is better for this stuff you can see it's pretty clear [Applause] going into this beautiful bit done completely clear so another day just got to get rid of all the rubble in here and when this is done i just take off these beans and just try and find any other junk that i don't want in the house five hours work plus yesterday two hours and we have an entirely almost entirely full skip while clearing the house we found old silver coins banknotes antique bullets a cannonball a 17th century bayonets and a few kilos of high explosives standard stuff so i've spoke to my friend cisco he's brought his cousin along and he's yeah he's like you gotta call the police one of those sticks he says getting rid of this today crux is coming now [Music] due to the size of my van get in the sand where i needed it was a bit of a game okay here i am using a big wall technique to lower a one ton trailer to the house let's see how this looks i think that looks pretty cementy this iron reinforcement was laying around in the garden so perfect for the floor so what i'm going to do now is replace the old monkey toilet with a toilet which we can use while the rest of the house is being done so we're just cutting out the old water pipe because it's in the way of where we want the waste pipe to be under the balcony was an old pigsty i got started on this room the trough had to be smashed out and the floor needed to be levelled this room we're going to turn into like a temper accommodation what we're doing is we want to put a lintel in and make a bigger window so the way we're doing it is we're taking it out from one side [Music] so we've put this cream in now we're going to cut out the other side so just basically doing this metal stud work for you this morning put in a board above here which would cast a cement in the middle between our two beams and we just put in the window so just come to the end of finishing this room just put the glass in the window um and plasterboard and a little bit more insulation plus i wanted to do so basically just clean up all this rendering we're going to put a big window in here [Music] so this is the first floor it's gonna be uh kitchen dining room and it's gonna be a little toilet down here i am taking away the beams downstairs so i can see what exactly is underneath it so now i'm cutting out this [Music] so quite a good end of the day these pillars have been cleared up ready for removal because we're going to have one really long two iron beams in the roof so what we're doing is we're preparing the ceiling to take out all the beams from this entire front of the house so basically what we need to do is take put some pressure on the beams using the jacks and put this out on the floor to protect the floor and on downstairs we've got some beefy jacks put like three or four across the beams downstairs as well just to transfer the weight to the ground when we take out these two big pillars so it's got the beams delivered fairly heavy i was required to get professional support to replace these beams it's a good job because more hands were needed to get them in place it's a long day of work over and we've prepared the top ball we've taken out all of these columns we put in these big metal beams and we filled it with concrete it's going to make such a difference to this room which used to be basically four rooms it's just gonna have this huge window when you're sitting down you just have sort of a bit of a panorama of the rocks [Music] so now it's time to start working on the roof and we've got to make a row of bricks around it we've got a little bricks these are already on the land so they're basically free the other thing we've got to think about is water um it's almost inevitable in the time we're doing the roof that we're going to have a big dump so we're going to chisel out the rest of this uh well it used to be a window now it's going to be a massive door um but we're just allowed to wait for the water to get out of this floor [Music] this is tadas he helped me with the roof build and the bigger ones other friends who visited me also lend a hand from time to time [Music] [Music] so messed up does the house look without a roof but we've got it off we've got the big uh one big beam out um that was a little bit of a struggle especially in your one ladder uh and now we're basically gonna go around the top of the wall and we're going to brush it clean and i'm going to use a couple boards clamped each side and basically fill it with rocks and cement basically make this wall perfectly level and flat because from top of that then i can build the bricks to make the cinter on the concrete cast reinforced steel edge which will go around the entire roof now we're going to remove the other half of the roof we've prepared most of these walls got them ready just a little bit more of that entity then we're gonna remove this roof tidy up that bit of wall and probably have a relatively short day because it's really hot so big day you've cleared all the rest of the tiles we need to do the three beams still i've taken them all down stack them down here and in the house [Music] beams here we just laid them out ready because we need to vanish it first we got to treat them and here more beams giant beam over there oh not quite sure how we're going to get that up on the roof this here is the start of the center on uh it would be another brick high and there's going to be a beam there we're going to cut some of it away and what we're going to end up is with a continuous reinforced band which goes around the entire roof [Music] can we try to lift it [Music] okay ready okay yeah we're over the edges [Music] oh [Music] is the rope holding [Music] ready [Music] okay very slowly oh try and put it says about two fingers from the back [Music] thanks guys no one died so we're just putting in these 36 centimeter long screws we fix the end of the roof uh the other end is fixed in the other end of the beam [Music] it's been a lot of work to get to this point flattening out the walls was enormous amount of work and then building the bricks getting the beams on uh and preparing all of the iron work within the wall to get it ready um so this is like the the last easy part but also one of the most significant so there we have it the concrete crane has done an amazing job it would have been oh probably hundreds of buckets and we're just leveling out [Music] so this is the thermo chip it comes as a chipboard which goes on the top of the roof 10 centimeters of insulation and then on the inside it's pre-fabricated so you end up with this cladding and basically the end joints go over the beam so it looks like it's continuous clad throughout your house [Music] so we're just putting on this edging strip here this will go up one side uh all the way around uh and the top and it'll look way tidy when we've got this stuff on the underliner this red stuff was next to go down so now putting on the boutillo which is just like a it's like a canvas a rubbery canvas and basically gonna again just nail it down along the edges [Music] so it's really cool now that the house starts to look like a house again i feel like it's a turning point where we destroy everything and it looks like more like a ruin and now it's starting to look like a real house again so we're basically going to remove this entire wall which will make a massive like door window thing [Music] it [Music] so now we have the hole um i just gotta just check the dimensions of the window and see how much bigger we need to make it to basically build up a nice straight line from floor to ceiling [Music] you framed in this big sliding door um and then we're using this like pretty sturdy timber to build up the walls make it flat just uh need a little bit more office to fit the door in exactly now what i'm gonna do is basically fix it to the walls [Music] right now the sandblaster mountain he's gonna strip all of the beams from this dark stained painted finish [Music] i'm making a hole downstairs uh and this will be the chimney hole so we've got the chimney fix into place now it's time to cut a hole in the roof so just putting the chimney on cut that hole through all the way to the other side i put the bracket at the top i think it's better it's stronger wood there anyway um and now i'm putting down this basically more or less formed into the shape here [Music] so cutting down some tiles to fit the end of the roof and the top of the room because it's 12 centimeter you need to cut off and it makes them more nicely aligned so right now we are moving all of the tiles onto the roof because you tile from the bottom edge up we have to get them all fish at the moment we're basically just stacking them up there [Music] we put a bit of fame across the top of the other one a bit of frame in the corner as well and see my little line underneath and just place it down so today we're going to finish the roof and that means we're going to cement that top bridge line [Music] [Music] going around and brushing off any of the excess so now uh i've got the chimney in place i know the fire is going to be i'm working on building the half so the half is gonna be five centimeters for some men so i had to cut a hole through the wall and this is for the fire the back of the fire so you've got two options you can have your fire uh and it draws the oxygen from the room but that means it's sucking in cold air from somewhere so this goes all the way through the wall the back of the fire these are the two pipes which will go to my heating uh to a pump and things and this is the uh the inlet for the for the air also in the last days we've uh be replacing the lintels on this window they were super thin you can see them there same thing you take out the whole front put one beam in take out the back put the beam in so right now we're building out a frame which is going to have a load bearing roof on it so in this room here we took out everything obviously um but on this side up to that beam is gonna be one big bedroom which has got this big door window thing however i'd like to have it so we can use the room above this bedroom there's like a mini loft an extra area so to do that we need to make it load bearing then we have all of these large beams which will go across [Music] so we've basically put this frame in now [Music] so now we're gonna basically take this window out and the same way we do the other ones we're gonna frame it in put in the new window there we have it the windows in really sturdy and strong it's gonna be a beautiful window window was custom made two meters by four meters and thankfully installation was part of the price [Music] i had a much needed holiday to escape from the cold weather but meanwhile the pandemic was brewing i got back two weeks before spain started one of europe's strictest lockdowns for two months hardware shops were closed and deliveries were extremely disrupted i had to juggle 10 projects at a time moving one to another as the materials run out or deliveries were delayed so here you can see these are all my conduit lines and my lighting and my plug groupings and i can kind of see how they connect together some ventilation some light groups and basically with this i can plan out the rest of the room and to do that i'm basically using spray paint and drawing where my plugs are units and it will just give me quite a good idea as i start marking this all out that's a radiator yellow we're gonna do my conduit lines and boxes and then another thing else comes off so i'm drawing in where i went my plugs uh where i'm gonna run pipes for plumbing so these will be from a fire go underneath the floor up through the other side [Music] so that's the main holes cut now just hit the hammer drill blast them through so today i am starting to frame out the insulation i'm using this channel stuff which is the norm in spain the tricky part is to make it kind of like see walls are actually straight so i've got this plum bob i can use this to make sure that the end result that my walls are going to be straight [Music] installing this metal stud work is fiddly but as it allows me to insulate it is worth the effort [Music] so as you can see now i've put this frame inside this niche and it's just the stuff you're dealing with here this line is just all over the place so it's kind of come in a bit um and this wall here is a slightly different angle to this wall here so it's just kind of about making it work with the space you have and trying to make it as square as possible and now around the half i've done the same thing i framed it out in these archways it's a little bit uh a little bit complex it's gonna come over and round it's easy for it to slide out of place here so as you can see i'm framing out the bathroom and all the other rooms at the moment back a bit uh put in the whole frame uh some cross members it's fairly strong now actually when the place will on is all screwed into it be much stronger this is the living room kitchen space and along this wall will be a kitchen um i don't trust this metal flimsy stuff to kind of like carry the kitchen shelves so what i'm going to do i'm going to build a wooden frame from the floor to the ceiling these are the uprights i might leave a corner just for now i'm not sure so today i'm starting to wire in the house [Music] so right now i'm putting in this conduit um so trying to use the big pipe which i've got which can't go through everywhere just because coronavirus shut down means i can't get drill bits and things so this i'm going to put as much as i can [Music] so put up a few boards and i'm going to feel really good about progress because suddenly uh this would now look like a room with just two pieces of board and taking about half an hour so right now i've been fitting in this toilet so this is the back of the bathroom and there's a window here which is just overall which is too big um and i also need to build like a frame to square it up because the shaft is going to go in here i just need to cut a bit of so pink you can see i've built the structure now the insulated dry will go from here to the beam at the top i've just been making these uh structural bits which will contain the water tank now i've got to work out where to put my electrical boxes so the electric boxes will connect all this flexible conduit this box here will have the wet sockets so the kitchen ones three kitchen ones the fridge uninterrupted oven line um and the same for like dishwasher and then i'm also going to need to kind of bring up uh cables which will go to aircon i think i could probably take it through that wall most easily just trying to work out all the bits and then i can start fixing the conduit in it's so hard to get this stuff to stay in because it's so soft for stuff too just breaking your hands that's the actual rock now i am putting it on this is like the main box for the room and then you have a hard plastic pipe which comes from downstairs to here [Music] now i can put in um some back boxes for the uh electrical stuff so this would be a light switch for a hanging light which would be in this corner so right now i am framing out a door here so essentially what's going to happen is this is like the front door to the stairs so you come up the stairs then you're in this little hallway uh which will have a sliding door here which is a toilet and then you open this door and then you're in the main space starting to make lists of everything that needs to be done up here in the sequential order now what i'm doing is i'm finishing the framing upstairs which means i need to put in the archways [Music] so screw fixed i you stopped some of their orders um but luckily i got one more order in so i've got a new 20 mil drill bit [Music] there's only one channel to cut up here and that's where i'll bring the pipes in this corner from downstairs they've come along the hot water pipes into the bathroom floor which still needs to be cemented and then just through this little hallway to meet this radiator which is going to hang here this is going to be the worst one because i suppose [Music] so back on wiring now we've done all the plasterboard in that little room and some friends and crashing it for a little bit so i've drawn out all my wiring diagrams uh as you can see it gives me an idea of what i'm putting through it's gonna have a lot going on here so you've got the lights for the bathroom the switches for all the rings in this room and also coming up all direct ones which will be going straight into the oven dishwasher which we directly without any connectors this is the diagram for it so this is the label for all of the actual conduits this is the coding scheme for the different lighted rings so now um i'm at a stage where i can start like putting the plasterboard on this little room um i've got this insulation i hated using rockwool it's in your lungs even with a mask this is gross so we've got this um kind of more ecological version uh which is a recycled coffin yeah i'm already pleased with this stuff uh it's quite dense the rock was super fine it folds flimsy this stuff it kind of like packs in that's solid [Music] such a nice surprise when he goes in and it fits basically perfectly it's a rainy day today which is a great day to be in the house jokes i'm in the house working every day we're basically insulating and plasterboarding all around the door this will be like a storage space up here insulated the back the sides the top and then the bottom i'm just going to put a piece of this chipboard which would be like the bottom of the cupboard so today i'm going to work on the stairs as you can see we're already insulating there's two ways to firm up these things against uneven walls one is you put blocks and screw them in like i have here um where it's like thin tip tricky or like in a corner where there's not vast amount of pressure i'm just slamming a little spray for him down it and when that sets it's actually to be really firm it's finally getting warmer now flip-flops and t-shirts in the house [Music] the process of turning these wide brackets which i would have to really crush this uh that's 96 cuts of some very thick steel so i figured that while i am doing the work i might as well make it as environmentally friendly as possible up on the roof and it's time to put in the first of the things that will support the rails for the solar panels to do that i knew i'd have to do it is basically rip up some of the tiles work out the next one repeat this and do it another 48 times [Music] so we're getting the solar panels on i pulled the rails on yesterday now we're putting the panels and we align them to the edge of the roof because at the edge of the roof the roof is actually the only square thing in the whole house that's the next bit onto the roof i've got a very important job right now if i let go of this and this could like slide down and take nate out that'll be really bad [Music] so today i'm gonna put in a board which i salvaged from an old pallet this will be my electrical panel there you have it unboxing's a thing isn't it this is the converter it's an absolute monster today i'm going to start working in this like nook space so this is the back of this nook area it's quite good you have quite a lot of space wow pretty fast just got a little bit on the end today so what i'm thinking of is just putting some drawers in i can screw them into the frame chop them down a little bit and then it will basically place the board around it and then we'll end up with some like cool shelves up here [Music] actually sort of worked [Music] alright this room is completely insulated uh plasterboarded obviously you still need to plaster it and paint it but this is really big progress [Music] the insulation is time-consuming to cut but it's still nicer than rockwool finally a couple of bits for my radius have arrived because it's just kind of these little valves so now i'm in the process of wiring up the downstairs or the middle floor um not going too bad this is my fire the back boiler [Music] after this i just needed to cement up the chimney so today i'm gonna try and do my first solder joint today i'm gonna put in the bottom of this fire half um got my pipes in waiting to be attached to the boiler but i first got to put the tiles down [Music] so that will cut no disasters [Music] [Music] so now we've got the fire in place there's a little bit of jiggery pokery but i do believe right now i can connect with all the pipes and the chimney looks pretty decent [Music] that's it i've put the fire in cemented it around both sides hopefully it's all good this is my heating setup this is the return and it pumps the water through this goes into the fire when it goes out of the fire at the top and then around my circuit yeah we're slowly getting better this scene for me sort of sums up filled in the line [Music] this is my 200 meter water if you're on the definition of insanity it has taken a project which is already more complicated than you probably would really desire and then taking it to a whole new level and this heat recovery system is kind of a whole new level so the heat recovery system goes to these they're called planiums for like you know ducks the heat recovery system extracts stale damp air from the house changes the heat over into fresh air which it takes in from outside and circulates that air into the house to allow pipes to travel through the house i needed to cut holes in the floor so i'm up in this space here working on the heat recovery system um i've just plaster boarded in this bit so i can basically have the inlet which will go into the bedroom um this is gonna have to be fixed probably through a hole here and then that's all the all these done in the top of the house you can see the bathroom one here and this one is the one which goes to the other bedroom [Music] today we're gonna smash out this uh ancient toilet and through a service purpose but it's time for it to go because it's just a use of spicy space [Music] so here i'm going to install the heat recovery system you have two of these boxes we have your in and outs um and then you also need like two holes going through the wall so now we've got the pipes going out the wall isn't that too bad i've got a lot of this to do in the house so i get to start learning now i'm just gonna cement a little bit on this side i've cut off the pipes in the outside put on the vent fresh air going in and this one is air coming out [Music] so summer is definitely here now it's quite a warm day it's a third warm day and i'm basically soldering out the rest of my pipes i have only three more joints i've kind of six more joints basically left to solder um and then my soldering is done and everything else is gonna be push fit [Music] so this is the feed expansion tank as you can see it's got a ball stuff in it so basically that lifts up [Music] so right now i'm plumbing in ready for the sink so i can plasterboard insulate this wall pretty much finishing off this water then i can insulate it and uh put the plasterboard on which would be great it's a big unfinished wall uh and what i've done is basically just run the push fit pipe so these are the hot water pipes coming from upstairs [Music] there we have it all insulated now basically it's time to get on and um put the plasterboard on basically got the kitchen ready to basically go in so right now what i'm doing is i'm framing out a bit around the door so this door into the main part of the house i mean a lot of days working away in here what's going on dave what i am doing is finishing the plastic wedding and as uh blasted everything now the last bit before painting is to fill in the gaps between the plasterboard and the [Music] wood so right now i'm working on the plumbing for my whole water tank and rig this thing up and in here um it looks really complicated but it's not too bad almost all the joints and taps are in this bit which means if there's a problem i can just turn off here today i am gonna put the concrete on the floor cement this out i guess i'll just glue this thing down so you're putting these two walls down the bathroom the shower tray is fixed now what i've got to do is re-cement this floor and i've got to try and make it level and on this side i've built like a frame out this is going to be where there's going to be like a like a sink unit plumbing-wise up here basically so right now i'm just laying out the underfloor heating there we've got the towel cement down for well a bit more than half floor what are you doing i'm plastering still but the top floor is almost done so it's [Music] cool [Music] we're just basically rendering up this wall finally i can test my fire no you wanna say okay and pumps running i can hear the water going round so i'm just going to use this wage watch light it up and i'll be able to see whether uh it starts going to my radius this is very cool it feels like home now why are you dusty because i'm helping me to build a house i've just been running around diving around the radiators and all the radiators in the house are now toasty warm right now i'm just putting the other side of the door frame yeah that's pretty strong now and i think when it's all done and place it in it's gonna be fine so now i'm gonna move on to in the bathroom here but what i really need to do first is cut a piece of wood against the wall and then kind of block it out and basically make this wall stronger just starting to tile out the bathroom floor so today um i'm gonna start breaking off this balcony wall um so i'm gonna replace the railings and i need to make room for the kind of structure the balcony will be in the main bedroom and it's gonna project out about two meters just gonna take out this entire wall got some rain coming i decided just to basically cap all this wall this pile of the rocks we should oh it's probably not good i want to have like an overhang lip concrete overhang lip um and to do that i need to build this frame round and then some sides [Music] spend a bit of time uh working out the height basically what the level is going to be in the balcony gonna have a slight down slope so it can run off now this is done i can start working out these big structures to make the balcony for the bedroom they're just basically trying out the welder my neighbor cisco a retired builder gave me some welding tips this is my rough plan for the balcony put some holes in the wall unfortunately on this hand i need to put a hole right here so as you can see i put two beams in this one and that one it's so hot at the moment i am basically just bolting this frame [Music] so basically finish the world i've ground them off i've got some like car body fuller in it [Music] see amazing now i'm just going to weld up any of the gaps look at this bit gappy so i can just basically improve that so now i'm removing the edges of the balcony i put in i want to weld up a railing which it kind of fits the style with the original railings which here i want the rails the uprights for the balcony they're squares one centimeter square um and i want them to be kind of at the angle just somehow looks better and it kind of fits the design of the old railings to make the balcony involved making and cleaning about one and a half thousand worlds which took an entire week this was a really good lesson in welding and actually i think the result was pretty great is what i made yesterday [Music] so here we have it you can have a look at some of my worlds don't judge not too bad not too bad not too bad [Music] so now i've finished the top alchemy the woods on and it's been painted with the oxide sort of paint metal paint really happy with the result [Music] comes the end of welding the balcony which to be honest with you i'm quite happy about [Music] i'm just filling all of these uh edges just sealing it all up i'm using this kind of acrylic stuff see the aircon here i was not allowed to install it myself so i got a local company to do it we're really really very much now in the decoration phase which is quite exciting they went away for a couple months so i was probably alone just me endless work and our dog tiger i am off the things now just time consuming and super super freaking dusty [Music] this is where the shower is these are like in an outlet so basically gonna start tiling up [Music] as you see it's coming together there's so much ease in the floor when it's just a normal thickness tiling the walls here on this wall this has been a paint experimentation wall i wanted a color that's gonna match this forest sort of view how that feel i've gone through three colors now but this one who knows what you can see on the camera but this one i think is the winner i'm gonna start working on the flooring solid oak this is the underlay [Music] now i'm going to finish off the flooring up here in the hallway [Music] so right now i'm still in more light through these up down lights and there'll be a hanging light in this corner um and on this side of the room we have these angled up lights so it is a bit of a moment of truth um we've got all the lights in i've clicked the switch downstairs and what do we have uh yeah so well it's really bright on the camera it's not that bright in real life so these are the lights along the roof it gives nice clay and then on this side we have the up down lights yeah and then i put this one in the corner i know this from work before we tested it um because it's on when i plugged it in my climber mate carlos helped me wear up the main spot so today what i'm going to do is wire up the downstairs um i need to get rid of the real nasty junk here it's obviously dangerous it's mostly just running conduit so what i'm basically gonna do is run cables down this channel i'm gonna bang in my boxes so i've got electric boxes for plugs um this is gonna junction box it's gonna run up this beam go around the room and feed into the other room so today i am installing doors and basically with the custom made frames you can kind of just put them in and screw them in quite easy these ones have to be cut and routed right now i am laying the under full heat in for the kitchen so today i'm going to try and lay this kitchen floor i've got to make it so it kind of brings it up to the height of my uh wood flooring now i'm going to tile the back of the fire you might be able to see in the light it's like a sort of textured tile a little bit of fun behind the pipes a little bit tricky in there and now it's all cleaned up and the kitchen floor now is all cleaned up so now the tile has been finished um on the balcony which means it's really nice space at the moment i am trying to install the shower [Music] so now the shower doors are in i need to seal it around i'm sitting but it's nice so i've got the radiator fix in hopefully it doesn't leak um attach the bum gum and also install the toilet any of these are particularly hard work but it's working on pressure so today i'm going to be working on a bathroom sort of vanity unit it's going to have like a sink which sits on top of a marble platform which is using the old marble which i've taken out the kitchen the house so this is the bar i'm going to be using [Music] looks pretty good i'm going to flip it over i'm going to do the bottom one there we have it we have two shelves which are 17 centimeters deep now i have this done i can basically make my others two sides [Music] here we have the frame this is marble which i found in the house it was in the kitchen originally and i'm going to use it as the countertop so as you can see the unit is kind of coming together it's not bad for basically half day's work just been putting the wooden sides what's quite nice actually is this unit is almost entirely made of scrap so now i've got the union up here basically job is to screw it in at the back [Music] so there we have it now let's try [Music] so today i will be doing something which is feel good things which is basically you're gonna put in some electric stuff it looks really like a house which is very cool [Music] downstairs um what i want to do is commission the heat recovery system so there it is it's wearing away look at that it's amazing and the one in the kitchen should be extracted and it is oh yeah taking the air out of the poop room check upstairs should be blown air in certainly is blown air in and this one here is blowing in lovely so i've cut planed and sanded down these two bits these will be opposing sides [Music] so i want it to look like it's basically like this sort of floating hidden shelf i'm gonna like basically place these pieces uh behind the chamfer and then when i put the kind of chamfer piece on um it'll kind of be a little bit invisible how it's held up i use the spare solid oak wood flooring to build basically all of my inbuilt furniture [Music] so i've just added um the outside plug socket which is the last plug stop at this floor so now i can just give these a test nothing blew up when i switched on downstairs i could check the outside one how many times does it break my camera in this cupboard area um i want to build a couple of doors i'm going to use the eight flooring it's such nice work i'm gonna use these so it's like a dark wood oak door so here we have it we have cupboard this whole space is very much ready for the safer to arrive and become properly housy it's amazing it's kind of getting to the point where you can say actually um maybe it's like almost finished so what i'm doing is i'm cutting down oak floorboards so end result is these pieces and i've like sanded them down and they can kind of walk around as you can see it's a floating floor so that means the floor isn't fixed down um because it needs to have space to expand and contract with temperature humidity changes so right now i'm installing the storage heater um for downstairs and there's another one in the main bedroom upstairs and basically with this system the idea is that the solar anything you're not using immediately so you're not running electric or light or oven it will dump it into the hot water tank and when the hot water tank's hot then it will dump into two other places the first will be the underfloor heating and then the rest will go into storage cheaters and see why they send them to you with this in very heavy box [Music] so you're going to sit down on the sofa pretty shortly makes it basically a house when you have a sofa right [Music] we are building the kitchen that's very exciting i've got some countertop material come in from a different place going to put in the top rail start hooking on these other cupboards check it fits the uh it's going to cover the extractor i really did not like building the kitchen it is repetitive and has no creativity well the kitchen top finally arrived while i was away now what we've done is i've cut along the back so it kind of just overhangs a little bit and now i'm going to cut out the place for the induction hub [Music] so now basically just putting in the sink there's these little connectors which you kind of pop in place and then you can kind of screw it up to all time in so today we're going to start rendering the top sort of edge of the house where we built the like the bond beam cintron kind of tricky getting the uh cement up the wall is pretty wavy so i'm just gonna tie two ladders together uh it's a little bit sketchy really steep this balcony is not very wide [Music] [Applause] [Music] so this is obviously the downstairs toilet um but it's also going to be the museum uh so here i'm going to have these lit boxes which will have like the old things i found in the house things like bullets or coins or notes using the spare balcony rails i made a sink unit for the toilet the last job was to render the top of the walls and paint the house job done [Applause] i would like to say that this was a transformative experience or there was some deep realization but that wasn't really the case it's just the usual life lessons that come again and again that consistent work pays off that big task is pretty easy if you just work hard every day and that things are not actually as complicated as they seem once you get stuck into them also that my friends and neighbors are pretty awesome now every day i appreciate not only the result of my work but also the sheer beauty of this place the ever-changing mountain scenes the light at different times of day the birds the trees just the biodiversity of this place it is a privilege to have a place like this as a base for further adventures thank you for watching i have documented this build into an ebook it has about 200 pages with lots of diagrams pictures and cost breakdowns if you want to support the channel or have a better understanding of how to renovate a house you can buy it using the link in the description huh
As an Amazon Associate I earn from qualifying purchases.


