

As an Amazon Associate I earn from qualifying purchases.

Yes, hello guys, welcome to my channel Smarthome Life. With this Video I start a new video series, KNX for beginners. I have noticed that a lot of people are interested in this and also people who are not from the profession, i.e. no electrician, but quite normal builders, who want to renovate a house
or build a new house and who are interested in a Smarthome System and in the end also in a KNX system. Of course I am happy about that and I would like
to explain the whole System to you, because there are many questions about how it works,
how it needs to be wired, etc. to do this we start this video series
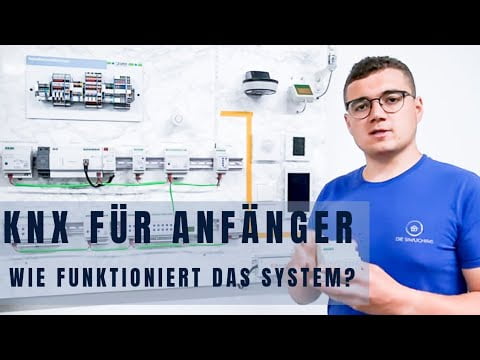
and go through it step by step. This video is about what the components are and how the whole KNX system works. Yes, we'll get right on it. Since this video series is called KNX for beginners, I will try to explain the whole thing as simply as possible, but not much with technical terms,
but really as simply as possible. Yes guys, and we'll get to that, what is a KNX system, and is it a standard? It is not a manufacturer
who produces the whole thing or that is manufacturer-dependent, but it is really a worldwide Standard, where the
manufacturers can apply for it and respectively if they install a KNX port according to these standards, they are allowed to sell it and also allowed in the KNX area, that's why there are so many manufacturers working on it and there are far more than 400 manufacturers who support the system.
Some might make a little something, so some just make that, some just make actuators that's why you can mix the whole thing. So, if now I like that from manufacturer A and actuator from another manufacturer or else I want to put expensive switches on the first floor now, on the upper floor something cheaper, which is
normally done, so you can mix and match, so you can really get it from anyone.
So if you build it in a house and it still has 25 digits, you can put different keys in 25 digits and they will work together. The whole thing is built up as a BUS System, we have the individual components, they are
connected to such a Twisted Pair Wire, a 2x2x0.8 wire, which means two pairs of two wires each. These wires have a diameter of 0.8 mm and usually only the two are needed, so a red and a black for plus and minus, for the power supply from the devices and for
the transmission of KNX protocol. Yes, these two wires are usually not needed, they are only needed to provide
an additional power supply when a device would need more power. So like a rain sensor, for example, that has a heater, this heater turns on as soon as it rains, so that the rain doesn't stay on it for too long and you think or the rain sensor thinks
all the time that it's still raining here, although it's only a little bit humid.
That's why it needs a heater. Yes, and these wires are then perfectly used. Even switches that would now need an additional power supply could be supplied by it. But also for a new line or a second line,
if you don't get along with the devices, you can use these
two wires as well. So I would say as a rule they are not used. Of course, there are other transmission options for KNX, i.e. IP technology, network technology, radio and Powerline. But usually in a one-family house environment
the whole thing is done over here, so to 90% or to 99% this line is used. This cable has been specially developed for the KNX-BUS you have the biggest advantage that you can place
his cable and this cable in a slot.
This cable has a thicker outer sheath, so it is possible to connect them together. There is a twin cable, let me put it this way, one is the cable which is basically
identical in structure to the one here, except that it has an outer diameter or an outer sheath that is much thinner, so it is not allowed to connect them together. Generally you could also use them but you would not be able, as I said, to connect
them with normal lines. This is a very common question that people ask: am I allowed to do this or not? What you should not be allowed to do now, of course,
is to install the whole thing like this. So in a switch box the whole thing is messed up. Right, so allowed, so… not like this. Now we can program the whole thing, namely
there is a single paid Software, which is called ETS, for the computer it's ETS 5 and for a Tablet would then be ETS Inside. The whole thing is parameterized, programmed and put into operation. Yes, then we come to my beautiful
DemoBot, which I have built. The System is divided into different groups
and also into unique system devices.
This is a power supply, once in sensors. There are, for example, switches, presence detectors and other and then the third is the actuators, which perform the whole. Each Sensor and each actuator has its own logic, so the System works decentralized. This means that we only need a power supply,
an actuator and a Sensor to make a System work. These boxes can then be programmed
into the actuators and the sensors, can be selected in the ETS, so there is a kind of online catalog and when you go into the ETS, you download this mini-program, you parameterize and program the whole thing,
how it has to work and then transfer it to the respective components, so either actuator or hold buttons and the whole thing remains stored in there and then works
via the so-called group addresses. We'll get to that in the next video. How does it work? There is a power supply that provides us with 30 volts.
These 30 volts
then serve as power supply and protocol transmission for the individual devices. Then we go very briefly into the power supply. There are various power supplies available, from the smaller 160 MA, 320, 640 MA,
and then even larger 960 and 1280. So usually a 640 MA power supply is used. Now, in the form, where it was not developed
at all, it was determined that a line should consist of 64 devices, and therefore also the 640 MA, because it was said that a device should consume 10 MA approximately. Why are there different variants? So, for example for a main line, which is now
not part of our video but nevertheless we have to cut this short, there are not many devices, so you use
such a small power supply. Or you actually have a Garage with three switches, etc. then you take a smaller one. Why is there a larger power supply? Because today there are devices that consume significantly more, such as a presence detector from Steinel, which I showed you last time, that consumes 40 MA. Or here such a glass panel, which has a display, which must
have much more power to illuminate the whole thing, it now consumes 20 M So if you had a 640 MA power supply
and 20 MA were used up, I couldn't build these 64 devices in one line.
Thus, you can take a power supply
that provides 1280 MA. Exactly, that's why there are differences. Then there are these power supplies,
which have then a diagnostic function that can report an overload example,
that can report an overheating, which is of course a maintenance advantage
that you can determine beforehand what is going on and / or that one is broken. It's because if a power supply breaks, then nothing works in the System. When I start the whole thing here with the power supply and from there all participants are connected to each other, it does not matter how you build the whole thing,
if you now grind all together. You can also go away from there and back again, etc. And the whole thing is only limited by this terminal, that you can only plug in four wires and therefore you can only go away four times. But basically you can build it as you like. What would not be good is if I now go around here once, so here and then back and inside, you form a ring and thus the telegrams get lost
when pressing buttons and the whole system does not work reliably or does not work at all.
So then the whole thing arrives here with switches
and everything is connected. From here, as soon as I press the button
here, a telegram starts. Via these two devices, it's made available on the whole BUS and which Actor or respectively which single channel
is programmed on this key, which fetches the Information and switches now here for example a light on. The same way it works with a motion
detector or a presence detector as soon as I come into detection zone, with a programmed signal sent provided on the BUS and on the BUS is then picked up
by the respective Actor. Yes, then we come to that. What are the sensors and actuators? I have a very, very small selection here, because
there are well over 25,000 components that can be bought in the KNX area. That is why we limit ourselves here
to the most important components. So there is an outdoor motion detector, indoor presence detector, weather station, in this case it consists of two components, i.e. a rain sensor and a wind sensor. This is also available in a combi version, where the rain sensor sets here and above and here the Wind is measured, temperature also, and here there is now no mechanical wheel,
but Wind is measured in this way.

What is still very important with this weather station is that the brightness is measured from each side. And this brightness can be used to make a wiring function. Yes, then there is such a button with the devices here, for example, where as a glass button is here, is a Display to control the whole System. There are also normal switches here,
which you know from home, you can also use for it, and here below is such an interface, which brings the whole thing into the KNX System. You do not necessarily have to use such KNX buttons. If someone says I don't like the whole thing, I
want to have normal switches. Yes, you can do it. Here you can take such normal switches, which you bring into the KNX System and still take the
comfort functions of central functions. Then there are such MPI devices or visualization devices such as the Gira G1 as an example, which
then control the whole thing centrally. You can then control the whole house,
namely shading, light, shutters, etc. can then be controlled centrally.
An intercom system can also go over here. What else is there on actuators? Here there is a shutter actuator, where you can control
shutters, awnings, windows or blinds. Then there is a dimmer actuator here, where you
could dim a dimmer lamp. The whole thing works over a phase section dimming. In other words, roughly speaking: the
voltage is regulated up, the lamp becomes brighter, the voltage is regulated under, the lamp becomes darker. Then there are switching actuators that switch normal lamps, also sockets, pumps and other consume 230 Volt range. Then there is a Data Gateway, which controls data in the lamp, namely there is a DALI-BUS, where all lamps
are connected to each other, they are programmed and the whole thing is insulated. All the transmission and all the programming
works via such a USB interface or via a network interface.
We have them here. Then there is such a LED Controller, which could control an EGB Stripe as an example. Of course, it can also control normal white Stipes
or 24 Volt LED lamps themselves. The whole thing works in such a way that here 24 volts
are provided by such a transformer for such a LED Controller and which then regulates the Stripes. Then we also come to one of the most important things,
namely heating Actor. This heating Actor controls or regulates
these actuators These actuators usually sit in the boiler divider.
This boiler divider then also forms the interface
between KNX and the heating itself, via such an actuator. Then we come to the Windows contacts. The window contacts are queried in such a way that a
magnetic contact is installed in the windows and this closes or opens and is then placed here, on Channel A, B, C, for example, and so you know that Channel A is open
and the window is open, for example, in the kitchen. Yes, now there are several other expansion levels, such as the visualization servers of BAB as an example. This controls all these logics and functions, if you want the shutters to open and close at a certain time, if you want the weather station to be
dependent on the time of day, if you want the outdoor lighting
to come on at a certain time or if you want the shading to come on in the morning, but if it is bright enough and such things are done in such a server. This server is then connected to network technology, so it must then be connected to the network in order to control the whole thing
with such a visualization tablet with mobile phone.
So these servers are not only there to make a gimmick, let's say,
with a cell phone or a tablet, but they are really there to make scenes in doors, processes, and finally
sequences that you can create yourself. Finally, there are interfaces to other systems, such as an ISE-Gateway for Sonos systems. These interfaces are in different stages of development, so whether this is now a TV interface, or whether this is now an interface to the heating system, etc. The biggest advantage of KNX
is that these interfaces exist. Many manufacturers are working
to connect different systems. The whole thing is then also connected via network
and then configured via a Browser. So where does the whole thing sit? So, I have made a clear separation here, here the whole is in a control cabinet centrally in one place and here the whole is then distributed in the House.
In the control cabinet, the whole thing is then wired via flexible
wires here to such terminals and then it goes from these terminals then
with fixed cables into the House. I would still like to address such a thing. There are devices that need an
additional power supply, such as this rain sensor, these interfaces, the servers. There is an output here at the power supply,
which would also offer 30 volts. Only this 30 Volt or this Milliampere,
which one would pull there, would be subtracted from these 640 Milliampere. And so my calculation may not be correct, as I have not designed a system.
Yes, because it's not known exactly how much
the heater of rain sensor consumes or how much the ISE consumes. Therefore, it's always recommended to set an extra
24 Volt power supply for such devices. Yes, guys, it's already done with the video. I hope you enjoyed the Video. I started shooting the Video at least 45 times, because I wanted to explain it as simply as possible and found out over and over again, it might
not fit like that, and that. Yes, definitely give me a thumbs up, write in the comments what other questions you have. With this series we will continue to progress.
We go into products, we go back
into programming a bit. Stay curious and… Bye!.
As an Amazon Associate I earn from qualifying purchases.


