

As an Amazon Associate I earn from qualifying purchases.

today we are headed back to dollar tree for
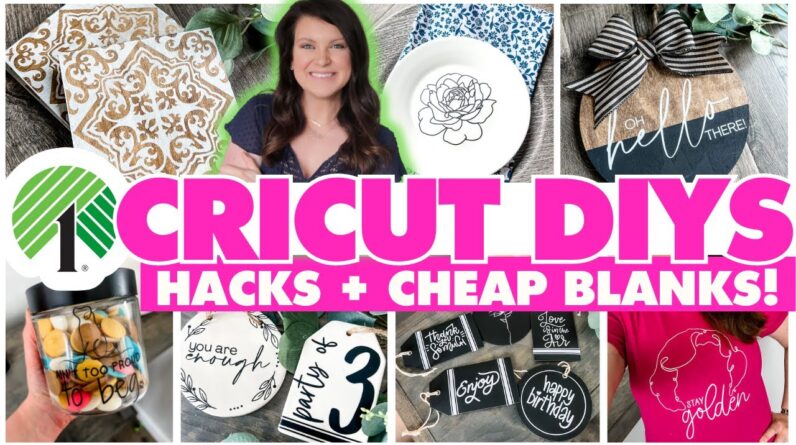
another round of my top blanks to use with your cricut i'm gonna show you what items to buy give
you free cut files tons of tips and tricks and show you how you can make over even the cheapest
items at dollar tree into some amazing decor this is whiskey and whit my name is whitney and
on this channel i love to share diys and budget home decor i also love to share tips and tricks
around cricut but you could use what i'm sharing today with any vinyl cutting machine that you
have also i want to give a huge thank you to thrive market for partnering with me on this video
and supporting whiskey and what let's get into the first project so we're going to start off in the
glassware aisle and i'm going to grab one of these small appetizer plates they have both square
and round so for today's project i'm grabbing a round one everything we're going to do today
you're going to want to start by measuring the middle of my plate's about four and a half inches
so we are going to upload a free file by clicking upload selecting the file that you can get from
my blog which is linked down below and then we're going to import it as a cut image once it is on
our canvas then we're going to get sizing which is up here and i decided to do mine four inches
wide because our circle is about four and a half inches i wanted some breathing room then i'm
cutting it out on some black matte vinyl all my supplies will be linked for you down below these
are all my favorite things and then i'm gonna use some expressions vinyl clear transfer tape another
favorite to apply it to the center of my plate it is that simple the great thing here is you
can use it in a variety of different ways for a decor purpose because we're using vinyl on the
plate here i would not recommend this for food but what i want to do with these is put them
on my dining room table in an arrangement idea number two is also in the kitchenware section
bamboo spoons i've been loving to craft with these they are super simple and you can make them look
really high-end so i'm just taking some one-inch painters tape wrapping it around the bottom
of my spoons to give myself a striped look and then i'm painting it with black chalk
paint i ended up letting that dry and then moving my tape around so i could create another
set of lines and you'll see here in a minute that i'm just gonna end up painting the entire thing
anyway i ended up cutting out these sayings gather and let's eat in the font white love you can
download for free at dafont they're one inch tall and i'm applying it to the handle of the
spoon sometimes you gotta use your squeegee and help it kind of get started then when that was
done i decided to make a thicker black stripe on the handle i like this much better i wrapped
that section with some jute twine added more twine to the ends so they could be hung up and these
are ready to go to be displayed in your kitchen idea number three are custom tags you can either
grab the wood ones like this or i like the paper chalkboard ones that come in tag shape and circle
now i designed a ton of options for you so you just need to import it and size it to three and
a half inches wide and cut it out now a quick tip here is to use the iron on cut setting when you're
cutting vinyl with intricate designs it's gonna yell at you to mirror it don't worry about it
that's just gonna help so it doesn't cut as deep then i'm applying it with my expressions vinyl
paper transfer tape so i don't rip the paper tag and it's that easy if you have any run over
of the lines on the edges just kind of push it over the edge it'll give you a seamless look
and these are ready for your gifts and parties we're gonna pop over to the actual
craft section for number four i loved sharing these in my last video and
so i've got some more ideas for these wood organizers that make beautiful signs we're gonna
stain it in early american stain but you can stain or paint it whatever color that you want
that matches your decor i just love this color and then i'm cutting out this decal that's free
over on my blog six and a half inches wide the square is actually seven inches so i did six and
a half inches to give myself some breathing room now because we've got stained wood here we're
using the expressions vinyl paper transfer tape less tack so it doesn't rip anything up and then
i applied my fun little design and i absolutely love this quote you'll have to let me know in
the comments if you know what show it's from so this next one is actually going to be for finn
and it is their night lights so by the time you're watching this we have actually sold our house and
are moving in with my mom and dad for a couple months until we can close on our new home and
so finn needs some nightlights for his new room so i decided to search for bluey coloring pages
on google and then i uploaded those images into cricut to make my own cut file i'm going
to start up here at the top and select crop so that i can get rid of any
of the extra stuff on the outside and then go back to this first screen and select
magic eraser that's going to allow me to click on any of these white open areas and get rid of them
so that it will cut out and you can also select preview up in the corner to make sure
you're getting everything you need to cut out especially if it's a multiple colored image
then add it as a cut file and you are good to go if you've got something small like this i suggest
cutting it on an iron-on setting and here are the sizes for bingo orange and bluey is blue then it's
as easy as taking your transfer tape and applying it to the center of both of your night lights and
they are good to go finn absolutely loves these and they give off a really good amount of light
and i like that that one looks kind of orange and this one is blue for bluey these will be great
for my parents and then also at our new house i got really excited in the store when i saw these
wood rounds and i actually grabbed them to send to jennifer a little bit of calm and crazy for our
mystery box i grabbed two for myself and decided to stain both of them with early american stained
by minwax then i'm taking some one-inch painters tape to section off the bottom part so i can paint
it black to get a really pretty two-tone look i'm not waiting for my paint to dry i'm just
peeling off the painters tape so that i've got a nice clean line now here's how easy it is you
can grab this from my blog this file and cut it to seven inches wide apply it with some paper
transfer tape so it doesn't peel up that paint you just put on add the hanger back
on and then i just made a fun bow with some ribbon i had in my stash and glued it onto the top
it is that easy to create a beautiful sign like this especially with a free cut file you can just
import and cut i also have this one which is life is better at the lake this file reminded me of my
husband and this is going to be so cute on our new door so also part of moving is organizing all my
craft supplies and i want to make sure i could find my scraps when we got to the new place so i'm
grabbing some of these little file folders from dollar tree and i'm cutting out the words that i
want seven inches wide in the font steinfeld i'm using clear transfer tape here versus the paper
because i'm not applying it to a delicate surface and i'm adding paper scraps to the gray one and
then the two pink are for vinyl neutral scraps and color scraps then these are really easy to put
on the shelf add things as we go all i have to do is slide in any of my scraps of paper
or vinyl i can organize by color and then there it is when i'm ready to craft again i love
saving my scraps because it helps me save money you know i love to save money when it comes to
diys i also love to save money when it comes to our groceries and that's what thrive market helps
me do it is an online membership based grocery store and their main goal is to make healthy
living easier more accessible and more affordable for everyone before i started doing whiskey and
what full-time i actually worked for a natural and organic food distributor but now that i don't
work there anymore and i live in a smaller town the products are either hard to find or when i do
find them they are really expensive this whole box that i got from thrive market if i were to
buy it in the store if i could even find it it would probably be over a hundred bucks based
on my math i got everything in here for under 60. so that is a huge amount of savings and with
the membership that you can either do monthly or you can also do annually the savings pay
for itself it's so much easier i don't have to go to the grocery store so i got some of
these brainiac applesauce pouches because finn is super obsessed with applesauce i also love
simple mills crackers so they're sea salt ones one of the big staples on my calorie deficit is
soup and i love these rayos ones veggie sticks for finn some chips and salty snacks for me and
these i am loving you treats for sebastian the biggest thing that i love about thrive
market especially with it being a membership based store is that i can get regular size items
and i don't have to buy these things in bulk you can click the link down in my description
or you can go directly to thrivemarket.com whiskey and wit through that link you will get
30 off your first order as well as a free gift worth up to 50 dollars when you join thrive market
got my snacks now let's head back and do some diys i get a ton of questions on yay or nay dollar tree
cricut items are they worth it or not i love the scraper and the little weeding tool and i really
do like their vinyl it's not super high quality but it'll work when you're labeling stuff or in
a pinch and they have some really pretty patterns j money diy recently sent me some of their faux
leather rolls in a mystery box and i ended up cutting them on the faux leather paper thin
setting it cut really well it gave me really clean lines and i was able to make these really fun bows
as well as some keychains that i also customized with heat transfer vinyl i'll link this video
down below if you want to check out that project i've been really enjoying making over
pizza pans for signs so for this one i'm going outside grabbing some flat black spray
paint flipping it over because we're going to use the back of the pizza pan i gave my pizza pan two
light coats and then i also followed up with some matte clear spray paint this is going to help have
your vinyl stick and not have it peel up the spray paint so then i'm using this free file from kahlua
designs it's one of the only ones i didn't design in this video i'm applying paper transfer tape and
then i'm going to cut out any extra transfer tape that i don't need from the file that is going
to allow me to not have extra things sticking on to the sign that doesn't need to be there so
i cut it apart to allow for more control on where things were being applied so my lemonade is on
the bottom part and my stopping for ice cold up at the top is easier to apply when it's its own
piece then i saw this idea from j money diy she did this to make a tray adding the nautical
rope around the edge and i thought it was so pretty i had to try it out myself i will link
her channel down below and then i finished it off with some more nautical robe on the back to
add a hanger with some hot glue and then i added a box i thought it went really well with the black
and the nautical rope and you could do whatever color you want here that's the great thing about
diy you can take what i did and make it your own number 10 are these glass jars these are awesome
for vinyl at dollar tree and because we made something for fin i'm going to make something for
sebastian whatever jar you pick you just want to make sure you have a flat outside so that you
can apply vinyl i'm going to use this one from christmas time i'm starting here again with that
spray paint i'm gonna spray paint the lid give it two light coats and then i'm gonna follow up with
that matte clear to seal it then here is how you can create a decal with your dog's name cut out
you're gonna start with the bone it's four inches wide then we're gonna add some text i'm typing out
sebastian and then i am gonna pick whatever font that i want this font is called subscriber and i'm
also making it white just so i can see it on the screen we're gonna select both the text and the
bone and then go up to a line and select center then with both of them still selected we're going
to click slice that's going to act as a cookie cutter you're going to get two sebastians out of
it and then also your bone which sebastian is cut out of then you're gonna cut it just like normal
and i'm applying it with the paper transfer tape so i don't have any issues peeling off that spray
paint and then to finish off the look i added this really cute ain't too proud to bag decal this is
another one of mine you can get over on my blog this is three and a half inches tall and then i
did some one and a half inch tall little pause again another free file you can upload if you want
to match this and i applied it to the outside of the jar this is gonna be great for my parents
so that all of his treats are centralized in one area just dump them in and it's good to go and
i also like that the top twists on to keep them delicious for him now you guys got to let me know
down in the comments what breed of dog do you have and what is their name these ceramic tiles are a
recent item to hit dollar tree and i love finding new things for this one i am giving you this party
of file you just want to make sure it's three and a half inches wide when you start then add a text
and add whatever number you want whether that's party three five seven nine eleven whatever once
it's in the spot that i want i'm gonna select all of it and hit attach that is going to allow it
all to cut as one file and then we're gonna weed it out and apply it just like we would anything
else i'm using my clear transfer tape versus paper because this isn't a delicate surface and
once i went to apply it i wasn't a huge fan of the double line so i only applied the line at the
bottom but you could do whatever you're feeling that's the great part of diys you can make it
your own i pushed the extra vinyl over on the edges so i kind of got a seamless look and this
thing is going to be great for tiered trays i did the same thing with this you are enough another
file of mine on the circular ones and i love these this next one has to be one of my favorite
dollar tree pieces that i've done and it's made out of these wood pieces i grabbed three of
these as well as a long piece that's about two to three inches wide to brace the back i put them
good side down so i could create a larger sign i'm hooking them together with some super glue gel
as well as my hot glue gun the super glue gel for long lasting stick and the hot glue for an instant
stick i added some weight to the top so that it would be evenly dispersed and then i finished
it off by adding some additional little popsicle sticks just to brace the two sides after giving
it a quick sand outside i also went through and stained it in the early american i'm using that
all video long it's just nice when things match and then i'm going to create a stencil
using this hack with quick cover the key here is to make sure you get the quick
cover and not this vinyl top liner that will work as well you need the quick cover it's as
easy as applying it to your mat just like it was regular vinyl but you're going to have to trim
down the width because it's wider than 12 inches and make sure you get it down without any
bubbles here was a disaster so i had to fix it i like to cut the quick cover on the iron-on
setting that has always worked for me and then you're going to peel it right off of
your mat and then get weeding just like it would be regular vinyl now here i'm doing a stencil so
i am weeding out the inner parts of the letters instead of the excess on the outside so anything
you want to show up on the sign this is a file that i made for our new house specifically
in mind and it is the lyrics from the new luke bryan jordan davis song called by dirt we're
country music fans in our house and i thought this kind of fit our next chapter really well and
it's easy to apply with that paper transfer tape once i got that all centered and
stuck down i'm using mod podge to seal down my letters just to make
sure there isn't any bleeding and then i'm going through with some white acrylic
paint on a disposable makeup sponge to dab it in once it's dry peel it off remove all of
your little pieces with your weeding tool and then your signs good to go if you want
this to be for a porch or outside just add a polycrylic over the top but i don't need to
seal it because it's going to be inside my house i can't wait to find the perfect spot for it
later this summer when we move into our new place now using that same technique i want to make over
these wood planks these are in the crafter square section and they're relatively new to me we're
staining with you guessed it early american and then i use the quick cover to cut out four of
those tile files that i shared earlier on those bigger signs this time i'm doing a 4.5 inch
square so it fits right on top of these pieces i applied them with my paper transfer tape and
then i went over the top with my little makeup sponge to create a stencil there as well now
i really did like the quick cover on top of that stain color so you could just leave it like
that as you see up in the right hand corner but i had committed at this point so i was painting
them all i used my weeding tool to remove all the quick cover and reveal the beautiful tile motif
and then i sealed them with some mod podge so i could use them as coasters and if there was any
condensation i wouldn't have an issue these are so fun i can't wait to use them this summer and
if you have a sensitive table you can add some felt to the back just little pieces to the corners
and it will save any tables so you don't scratch i love me a good reverse canvas project
so that's what we're going to do for this one i ended up grabbing two of these black
canvases because i liked the color of the fabric on the inside here which is what we're gonna end
up seeing get them out of the packaging and take a flathead screwdriver and pliers to get out all
of those staples to remove the canvas fabric then you're going to take your frames outside
give them a quick sand and then also give them a quick stain i used early american shocker but
you can use whatever paint or stain that you want then i brought them back inside to figure
out how big my design needed to be to fit within the frame i decided that was eight
inches wide so i designed these two pieces so i could have a matching set and with
heat transfer vinyl we want to make sure to mirror it what you're going to do here on the
left hand side we also want to make sure we put the shiny side of the heat transfer vinyl down
now word to the wise if you're new to cricut the vinyl i've been using throughout the whole video
is different from this it is a different kind of vinyl and it only bonds with heat so you're going
to want to make sure you have the right vinyl to do this project and it probably won't work
with adhesive vinyl so just keep that in mind then after it's weeded i'm pressing it at 325
degrees for 30 seconds i used my frame on top of my canvas to make sure it was aligned to the
right as well as the bottom like i wanted it and then i pressed it to set it now
i don't like to peel it when it's hot i like to give it a minute probably
about 30 seconds or so and then you can peel off that carrier sheet and reveal
your artwork repeat the same for your second sign and then add some hot glue to
your frames to hook it back to the canvas you can also use a staple gun to hook it down but
mine was already packed so we went with hot glue i love this set i absolutely love the sentiment
to this sign especially as a mom of a toddler just want to make sure i'm soaking everything
in i love the fonts the color all the things another question i get asked all the time when it
comes to qriket is when would i use heat transfer vinyl on wood most of the time i say you don't
need to do that and i've never used it until this point but i figured hey this is as good
a time of any for me to check it out and let you guys know what i think so i cut out some of
these office files i added them to one of those square organizer signs for 30 seconds i ended up
having to do this twice so maybe 315 for a minute and it applied actually really well to both
these and the little wood planks i don't think it necessarily changed my mind to think i need
to put heat transfer vinyl on things but those other ones i plan to use for coasters so i think
the fact that it's sealed down will be helpful number 16 is an awesome hack if you've
got a wedding coming up yourself or for a gift for someone getting married grab
two champagne flutes or as many as you need from the glassware section and then i measured
my glass and cut out both mr anderson and mrs anderson in a font that i liked i'm weeding this
as a stencil so as you can see here the white is what i'm weeding out instead of the outside and
applying it to my glasses now here because it's curved as you start to push it down you're going
to get some bubbles so just take your scissors and chop the kind of crease give it a little slit
and that's going to allow it to sit flat on your glass add a little bit of painters tape just in
case you go over the lines like i do and then i'm using this armor etch to etch the name into
the glass this is just a regular old paint brush and i'm making sure everything is covered in a
decently thick coat of the armor etch and i let it sit for anywhere from 10 to 15 minutes it really
just depends on when i'm done with the project i was doing while it was setting then i take it over
to my sink once it's all set use some hot water to wash off all of the remnants of the armor edge
peel off your stencil and painters tape and then clean it with some soap and water now these are
all done they are great for weddings they are nice because they are dishwasher safe they would
also be nice for retirements to give with a bottle of champagne tons of different options
and i love the etching because like i said it is dishwasher safe for number 17 we're going to
do the same process but with this beautiful vase that i found at dollar tree the shape is new
so i had to add it to the cart i ended up cutting out these leaves i've got a longer leaf and a
shorter leaf for you over on my blog the longer leaf i cut to seven inches tall and the smaller
one i did five inches tall and then i ended up doing the two tall leaves first so applying the
stencil etching like we just did on the glasses cleaning it and then applying the two
smaller ones on the two opposite sides that allowed them to kind of intertwine and
it just gave me a little bit more kind of room to make sure everything lined up now you could
absolutely use this for fresh flowers but i think i might use this to house these beautiful felt
peonies that i recently made in another qriket video i will link that for you if you want to see
how you can make these with your cricut as well i heard this so many times before but you guys
i'm just obsessed with screen printing dollar tree shirts with my screen printing kit i've got
a full video that will show you how to do this it includes all the supplies just everything but the
screen printing kit is one of the biggest items that you guys will go to amazon and get every time
i share it so i know you guys are trying it out and i love this file from the golden girls i
absolutely love this betty white file that says stay golden and i had to text jamie over the
crafty diy guy the second i made this because i knew he would appreciate it he also enjoys the
golden girls i will link his channel down below what i absolutely love about these is that once
you heat set it it's permanent it's going to last a lot longer than your heat transfer vinyl and
i also like that i've washed my other pieces so many times and they're not cracking they're not
ripping it is just in the fibers of the shirt and a dollar 25 has never looked better i hope
this video motivated you to get crafting and also inspired you to think of a dollar tree
items in a new way when it comes to diy also a huge thank you to thrive market for sponsoring
today's video and supporting whiskey and wit you can head down the description for more information
on them or you can head over to thrivemarket.com whiskey and wet for 30 off your order
and also a free gift worth up to 50 dollars when you join thrive market today so
be sure to go check them out subscribe if you're new so you don't miss a future whiskey and whip
video and i will catch you in the next one bye

As an Amazon Associate I earn from qualifying purchases.


