

As an Amazon Associate I earn from qualifying purchases.

– How you doing today? We're gonna build two
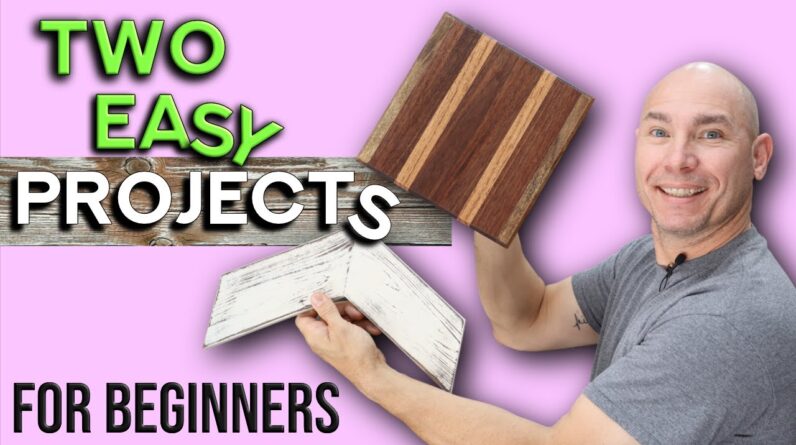
quick woodworking projects, one of which is a lazy Susan. Let's get started. So if you're looking for
quick woodworking projects that you can build to give as gifts, or quick woodworking
projects that you can sell, these two are perfect for that. We typically sell these
chevrons for about $30 a set. They come in sets a three. They're very easy to make, you can make them out of your scrap wood. You can make this out of scrap wood, or you can make one like
this out of scrap wood also, I'm gonna show you how
to make the round version and the square version of the lazy Susan, link in the description below
to the lazy Susan hardware, you can get four of
them for less than $15. This is a four-inch version. You can get six, eight, whatever. They're a ball bearing design,
they glide super smooth. This makes a great centerpiece. This is actually made
out of walnut, white oak, and then on the edges, some
black willow that I had. Hey, don't worry if
you don't have hardwood like this walnut, white oak, we're gonna be a one out
of a common onebasix.
That is one-by-six if you're not Southern. So don't worry about that. If you do want some hardwood, and you don't know where to get it, I'm gonna drop it a link
in the description below, you can go to rockler.com. They actually sell
different size material, already dried everything like that, You just, or you can actually
even order a butcher block kit and make your own butcher
block out of the hardwoods that they've already provided for you.
So if you don't have access to that, it's a good way to get it, if you don't have access to this. Let's get into this video. Bah. I'm not a photographer or videographer, but I'm sure cleaning the
lens with a shirt tail is probably not recommended. First small project or quick project that you can make to sell,
we've made several of these and sold some, they work
out well, they look nice, people like them. Chevrons. This is so simple. You can build these out of your drops, buy you a one-by-four and
cut 'em 30 degree angles. Let me show you how I do it. First thing you do is
cut your first angle. So this is just a common
spruce one-by-four. My saw has an automatic
detent at 31-and-a-half, or 31.6 degrees. You can put it at 30 if you're
just using your speed square or something to get your angle, but 30 to 31-and-a-half
degrees is perfectly fine, either one of those work.
And we'll just cut. (saw whirs) You can make them as long as you want, but I'll make these
about eight inches long from the long tip of the
angle to the short tip, and you're gonna cut parallel angles. (saw whirs) And I'll just take the first
one I've made, that I've cut, lay on top, make sure they're
exactly the same length or very close to the same length.
I mean if it's not
perfect, nobody will know. (saw whirs) So now I have these two pieces, and they're just gonna
fit together like this. It's extremely simple. The sharper angle, the more obviously, the sharper the chevron. These are the 30 degree angle, so they look like a nice angle there. And how I attach these,
you can glue these together because they're only
gonna be wall decorations. You just put you some wood glue on there, make sure that the top and
the bottom fit together, and you can just hold these together or take you a small clamp and
hold some pressure on there, that'll work just fine. Or if you're in a hurry, what I do, I just take my pocket-hole jig.
This is the K5, I highly
recommend this one. (drill whirs) Drilled me two pocket-holes in there. These are the inch-and-a-quarter
Kreg pocket-hole screws, Kreg face clamp. (drill whirs) I like to move the face clamp down right where the screws are gonna go in. That keeps everything nice and even. (drill whirs) There's no wait time, there's
no waiting on the glue to dry, that sucker is there. And we hanged ours with a command strips, or you can get the little alligator clips that's got the little teeth on it. Attach on there so people can hang them, they're very inexpensive. These things are so simple to make, you can make 'em with a circular saw, and any way to make an
angle, a 30 degree angle, pocket-hole screws, or you can
actually glue them together so you don't even need a pocket-hole jig.
You can buy these command
strips at Walmart or on Amazon. You can round these edges
over if you have a router, or you can chamfer them
if you have a chamfer bit for your router, or you
can just leave 'em square. This is, this one is just
a square one-by-four. There's nothing done to
it other than we sanded it with 120 grit sandpaper. You can check out how
we do this distressing. The link to the video will
be in the description below. But these are very
simple, you can stain 'em, you can paint 'em any number of ways, and they make excellent
wall art decorations. So you could probably get
three-and-a-half, four sets of these out of a 10-foot one-by-four. Let's check out the next project. (lazy Susan clattering) That's a lazy Susan. These are easy to make. You can sell them. So if I was to make another one of these, let me get my tape measure. This is a one-by-six. Just a common spruce one-by-six. This lazy Susan is 14 inches in diameter.
Longest piece I would
need would be 14 inches, and you're gonna need three pieces. One, two, three. I'm just gonna come over to the miter saw, measure 14 inches, and
I'm gonna make a mark, and this'll be my center
board, so the 14 inches is the longest one you're gonna need. You can make these out of drops, you can buy your own one-by-six
and make a couple of these.
(saw whirs) So I'm actually making one of these out of all scrap lumber that
I've got laying around. And I'll just lay that
14 inch piece on top of the other one. (saw whirs) Now you can joint these with a table saw, link in the description
below to that video if you haven't seen that, if you want to have that
real tight seamless joint. You can see that seam right there, but it is a very tight
joint because those edges were jointed with the table saw. I don't have a jointer. However, a more rustic look, or if your board will fit
together, pretty good, it looks like this one's going to, I'm gonna leave that seam in
there to make things easier 'cause it's not gonna matter
on a lazy Susan like that 'cause a board, this one-by-six,
actually has a little bit of a rounded edge from the factory, and so it'll give it a little indent there where they're joined together.
And we're just gonna join these together. You can do it with glue if
you got a nice tight seam and you can clamp it together. I'm gonna do pocket-holes again because they're fast,
strong, and they work. Before you do the pocket-holes, I highly recommend go ahead
and lay out your circle. This does a couple of things. One, you'll see how your
board's gonna be able to fit together and make
sure there's not a giant gap in those two because sometimes
if your board is warped, or has some type of imperfection in there, you'll be able to see that
gap and you can choose not to use that base or whatever. But you also need to lay after circle so you know where to do your pocket-hole, so you don't actually cut the screws. So there's no real rocket science
in how to draw the circle. You can use something like this. If you have a giant
compass, you can use that.
This is a smaller bucket. This is what I use,
this is a bigger bucket, five gallon or a three gallon
bucket, I'm not sure exactly. So I wanna center that as best I can. So about a inch and a
eighth on each side of that. So I've just centered this up, I got equal measurements
on each all four sides, and we'll use a mechanical pencil. I prefer these over
carpenter's pencils because. So that's gonna be our lazy Susan. We know all of this is cut. I label 'em one, two, and
three so I know where they go. I wanna put two pocket-holes
here, and two here, and that'll hold the whole thing together. (drill whirs) If you don't have one of
these, I highly recommend it. So I'm just gonna take, try to get as close to that
pocket-hole as possible, clamp that together. (drill whirs) So I'm just gonna take my jig
saw and cut that circle out. Try to get as close to
that line as you can, and try to follow that
line as much as possible so you can get as good
of a circle as you can.
There is a circle cutting jig for a router if you have one of those. I have the circle cutting
jig, I'm not gonna use it because of simplicity. This will cut it out close enough, and we can sand off any imperfections. So I didn't do the best job
of cutting that circle out, I kind of done it in a hurry. I'm gonna take my sander
and just start sanding that, and try to round it up as best I can, but you need to get it close. (upbeat electronic music) (lazy Susan gently clatters) Just gonna attach that lady
Susan piece to the bottom, it just screws on with
some half-inch screws, stain and paint that
whatever color you want, that's a nice little quick project.
So I actually have some
walnut and white oak drops off of other projects. (wood clatters) If you wanna fancy up your lazy Susan, you can use hardwoods and make
it look a little different. You can stain or paint
this to stress this, whatever you wanna do. This is spruce, it'll work perfectly fine. These will sell, these will
be a little less expensive because it's softwood,
is very accessible wood. You could probably make
four, three, four of these out of a 10-foot, one-by-six. And so it'd be very economical for you to build several of these. Buy the lazy Susan hardware
linked in description below, and you can have several of these you can offer for sale locally, or on your Etsy shop or
online shop, wherever you got, But just because I want
to, I wanna make one out of walnut and white oak. Let's do it.
So because of this stuff
is different thicknesses, I'll be using a planer. Most beginners aren't gonna have a planer, and so I'll be using a planer to get all these the same thickness. However, we will be cutting these down into smaller strips and
gluing them together All right, I got my lazy
Susan hardware in from Amazon. As you can see, they're ball bearings. It's gonna be a smooth, man
it is smooth turning, right? So this is what we're using. They come in packs of
four for like 13, $15, they're very inexpensive so
you can batch these things out. It'd be a good seller for you. Let me show you how to install it. I'm just gonna take this
old tee shirt and lay down. This is what I use as
basically a shop rag. I'm gonna find which side I
like best for the top of this, we're gonna turn it face down.
T-shirt's to protect this
from being scarred up or get paints transfer, some junk on there from the work bench. Take my lazy Susan
hardware, lay it on there, and find the center of it. Three inches to the edge each way. And I'm just gonna
attach that corner first, and then we'll square it up
and do the other corners. Always pre-drill. (drill whirs) We'll make sure that
we don't split our wood at this point in the game. And I've just got these
little bitty screws that I have on hand. You don't have to use
anything in particular, just a wood screw.
Don't overdrive 'em. (drill whirs) Just wanna make sure the
head doesn't stick up and interfere with your rotation. Now I'm just gonna take a
square, square that edge up. Now that I've got one side tied down, as long as it's close,
you're not building a clock, so it's not gonna matter
an extreme amount. (drill whirs) When you're pre-drilling, especially as thin as this piece is, you wanna make sure you don't
drill all the way through and punch a hold on the other side, that's one of the main things
you're looking for there. (drill whirs) One good thing you can do is all like on our other lazy Susan that has that cork circle
bottom, just a round cork board, you buy those at any
craft store or Walmart, hot glue that dude on there. That'll protect your tables, or I have some of these
just felt stick pads. I mean, they're just stick-on felt pads, they stick to most everything pretty good. I'm just gonna stick one on every corner. That'll keep it off of any
surface from scratching it.
These are felt, so they'll
slide a little bit. They're not slippery, but
you just stick those on, and then they can peel
'em off if they want to, but they have to actually
pick at 'em to get them off 'cause they're pretty sticky. Yeah, baby, yeah. Was trying to spin it and play. Big dummy. This turned out so nice. Check that out. The WATCO Danish oil, as well
as this lazy Susan hardware, links to those will be
in the description below, go check those out for yourself. If you like these projects,
click that next box right there, it takes you some more project videos.
Don't forget to hit that thumbs up and subscribe If you haven't already, I appreciate that more than you know. If you click that box right
there and watch another video, you get a virtual fist bump,
and I appreciate you watching. Come back for more if you
liked this project video, these quick projects, comment
below and let me know that,.
As an Amazon Associate I earn from qualifying purchases.


