As an Amazon Associate I earn from qualifying purchases.

3D-printing brand-new parts for the A1 taught me a lot about plastic, and other things.
Various plastic filament benefits various things( and some kinds do not work well with the A1 and other open-bed printers).
Credit: Andrew Cunningham
Various plastic filament benefits various things (and some kinds do not work well with the A1 and other open-bed printers).
Credit: Andrew Cunningham
For the last 3 months or two, I’ve been finding out to utilize (and love) a Bambu Labs A1 3D printer, a huge, loud maker that rests on my desk and turns images on my computer system screen into real-world items.
In the very first part of my series about diving into the wild world of 3D printers, I covered what I ‘d learnt more about the various kinds of 3D printers, some beneficial settings in the Bambu Studio app (which ought to likewise be broadly beneficial to understand about no matter what printer you utilize), and some preliminary, magical-feeling successes in downloading files that I developed into helpful physical products utilizing a couple of feet of plastic filament and a couple hours of time.
For this 2nd part, I’m concentrating on what I found out when I started my very first significant job– printing upgrade parts for the A1 withthe A1. It was here that I made a few of my very first huge 3D printing errors, errors that triggered me to check out the various type of 3D printer filament, what each kind of filament benefits, and which types the A1 is (and is not) proficient at dealing with as an un-enclosed, bed-slinging printer.
Just like the details in part one, I share this with you not since it is groundbreaking however due to the fact that there’s a great deal of details out there, and it can be a challenging pastime to burglarize. By sharing what I discovered and what I discovered helpful early in my journey, I hope I can assist other individuals who have actually been disputing whether to start.
Experiences in recursion: 3D-printing 3D printer parts
A display screen cover for the A1’s screen will secure it from wear and tear and enable you to quickly conceal it when you wish to.
Credit: Andrew Cunningham
My really first task was a holder for my workplace’s ceiling fan remote. My 2nd, likewise, was a wall-mounted holder for the Xbox gamepad and wired headset I utilize with my video gaming PC, which generally simply needed to drift around loose on my desk when I wasn’t utilizing them.
These were both fairly fast, basic prints that revealed the printer was working like it was expected to– all of the integrated temperature level settings, the textured PEI plate, the printer’s calibration and auto-bed-leveling regimens amounted to make basic prints as dead-easy as Bambu assured they would be. It made me excited to look for out other prints, consisting of things on the Makerworld website I had not believed to attempt.
The very first issue I had? Well, as part of its pre-print warmup regimen, the A1 spits a number of grams of filament out and tosses it to the side. This is absolutely typical– it’s called “purging,” and it eliminates filament that’s gone fragile from being heated up too long. If you’re altering colors, it likewise clears any last littles the previous color that are still in the nozzle. It didn’t appear especially classy to have the printer permanently releasing little knots of plastic onto my desk.
The A1’s default style simply ejects little molten heaps of plastic all over your desk when it’s altering or purging filament. This is among lots of waste bin( or “poop bucket”styles made to capture and keep these bits and pieces.
Credit: Andrew Cunningham
The option to this was to 3D-print a purging container for the A1( likewise described, naturally, as a “poop bucket” or “poop chute.”There are loads of purging containers created particularly for the A1 due to the fact that it’s a relatively popular budget plan design and there’s absolutely nothing stopping individuals from making parts that fit it like a glove.
I printed this container, along with an extra little bracket that would “catch” the purged filament and make certain it fell under the container. And this unlocked to my very first significant printing job: printing extra parts for the printer itself.
I required to YouTube and enjoyed a number of videos on the subject due to the fact that I’m obviously far from the very first individual who has actually had this response to the A1. After much watching and reading, here are the parts I wound up printing:
- Bambu Lab AMS Lite Top Mount and Z-Axis Stiffener: The Lite variation of Bambu’s Automated Materials System (AMS) is the optional device that allows multi-color printing for the A1. And like the A1 itself, it’s a lower-cost, outdoor variation of the AMS that deals with Bambu’s more costly printers.
- The AMS Lite features a stand that you can utilize to set it beside the A1, however that’s more horizontal area than I needed to spare. This leading install is Bambu’s main service for putting the AMS Lite on top of the A1 rather, conserving you some area.
- The leading install in fact has 2 crucial elements: the leading install itself and a “Z-Axis Stiffener,” a set of legs that extend behind the A1 to make the entire thing more steady on a desk or table. Bambu currently suggests 195 mm (or 7.7 inches) of “safety margin” behind the A1 to provide the bed space to sling, so if you’ve left that much area behind the printer, you most likely have adequate area for these legs.
- After setting up all of these parts, the leading install, and a totally filled AMS, it’s most likely an excellent concept to run the printer’s calibration cycle once again to represent the distinction in balance.
- You might wish to print the leading install itself with PETG, which is a bit more powerful and more impact-resistant than PLA plastic
- A1 Purge Waste Bin and Deflector, by jimbobble. There are around 1 million various A1 purge pail styles, each with its own appeal. This one is big and basic and consists of a variation that is suitable with the printer Z-Axis Stiffener legs.
- A1 rectangle-shaped fan cover, by Arzhang Lotfi. There are a lot of alternatives for this, consisting of enjoyable ones, however you can discover lots of basic grille styles that snap in location and secure the fan on the A1’s print head.
- Bambu A1 Adjustable Camera Holder, by mlodybuk: This one’s a bit more complex due to the fact that it does need some possibly warranty-voiding disassembly of parts. The A1’s electronic camera is likewise quite dreadful no matter how you place it, with sub-1 FPS video that’s simply hardly ideal for examining whether a print has actually been messed up or not.
- If you desire to utilize it, I ‘d extremely suggest moving it from the default area, which is low down and at an odd angle, so you’re not getting the finest view of your print that you can.
- This print consists of an upgraded cover for the electronic camera location, a filler piece to fill the hole where the camutilized to be to keep dust and other things from getting in the printer, and a little electronic camera receptacle that snaps in location onto the brand-new cover and can be shown up and down.
- If you’re not comfy modding your maker like this, the video camera is habitable as-is, however this got me a far better perspective on my prints.
With a little effort, this print permits you to rearrange the A1’s cam, providing you a much better angle on your prints and making it adjustable.
Credit: Andrew Cunningham
- A1 Screen Protector New Release, by Rox3D: Not strictly needed, however an inconspicuous method to safeguard(and to “turn off”the A1’s integrated LCD screen when it’s not in usage. The hinge system of this print is stiff enough that the screen cover can be raised partway without tumbling pull back.
- A1 X-Axis Cover, by Moria3DPStudio: Another only-if-you-want-it print, this collapsible cover moves over the A1’s exposed rail when you’re not utilizing it. Simply ensure you take it withdraw before you attempt to print anything– it will not break anything, however the printer will not more than happy with you. Not that I’m speaking from experience.
- Ultimate Filament Spool Enclosure for the AMS Lite, by Supergrapher: Here’s the huge one, and it’s a real knowing experience for all examples. The routine Bambu AMS system for the P- and X-series printers is confined, which works not simply for keeping dust from picking your filament spindles however for managing humidity and keeping spindles you’ve dried from re-absorbing wetness. There’s no first-party enclosure for the AMS Lite, however this user-created enclosure is versatile and popular, and it can be utilized to confine the AMS Lite whether you have it installed on top of or to the side of the A1. The little plastic clips that keep the covers on are slightly annoying to pop on and off, relative to a cover that you can simply raise and return down, however the advantages deserve it.
- 3D Disc for A1 – “Pokéball,” by BS 3D Print: One of the couple of simply cosmetic parts I’ve printed. The little spinning bit on the front of the A1’s print head reveals you when the filament is being extruded, however it’s not a practical part. This is simply among lots and lots of cosmetic replacements for it if you select to pop it off.
- Tough Modular Filament Spool Rack, by Antiphrasis: Not technically an upgrade for the A1, however a simple suggestion for any brand-new 3D printers who all of a sudden discover themselves with a rainbow of a dozen-plus various filaments you wish to attempt. Each rack here holds 3 spindles of filament, and you can print extra racks to spread them out either horizontally, vertically, or both, so you can make something that precisely satisfies your requirements and fits your area. A two-by-three rack provided me space for 18 spindles, and I can print more if I require them.
There are some things that others advise for the A1 that I have not printed yet– generally guides for cable televisions, vibration dampeners for the base, and things to strengthen locations of possible tension for the print head and the A1’s loose, dangly wire.
Part of the enjoyable is determining what your issues are, recognizing prints that might assist fix the issue, and after that attempting them out to see if they do fix your issue. (The parts have actually likewise offered my A1 its purple accents, because a brilliant purple roll of filament was among the very first ones my 5-year-old wished to get.)
Early errors
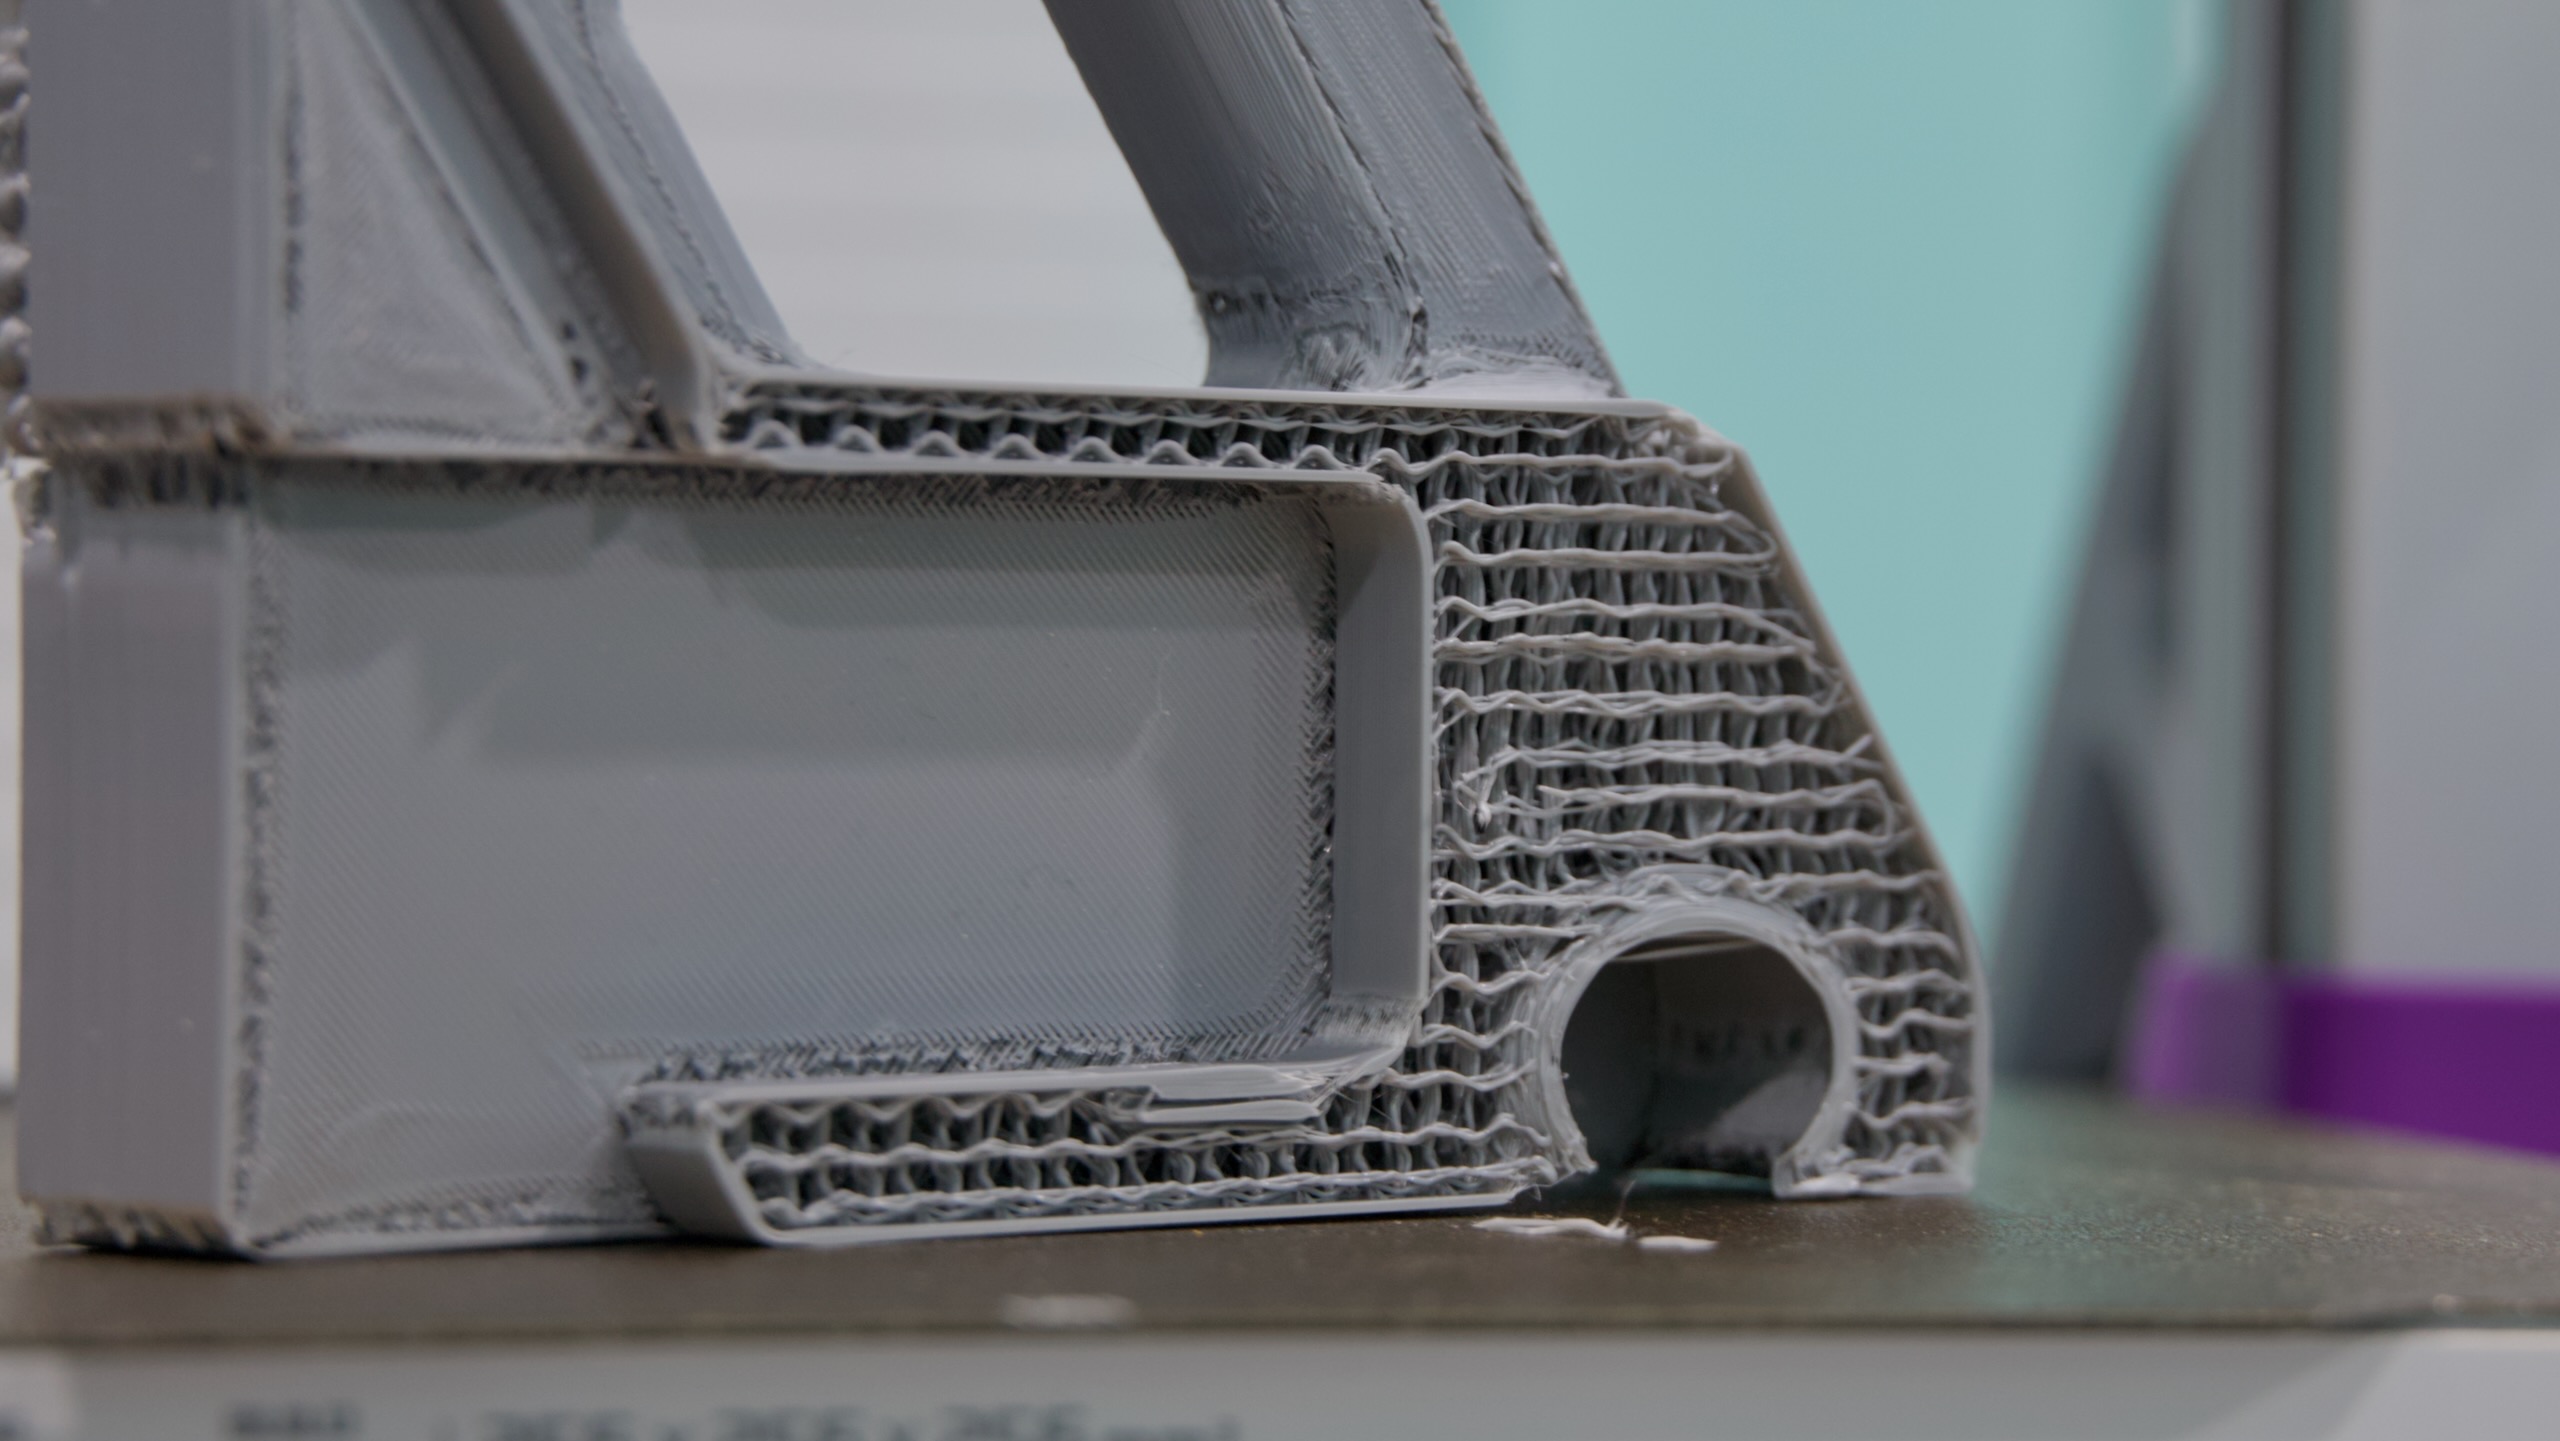
The “Z-Axis stiffener,” an additional set of legs for the A1 that Bambu suggests if you top-mount your AMS Lite. This took me 3 attempts to print, primarily due to the fact that of my own lack of experience.
Credit: Andrew Cunningham
Printing each of these parts provided me a strong refresher course into typical risks and novice errors.
Did you understand that ABS plastic does not print well on an open-bed printer? Well, it does not! I didn’t understand that when I purchased a spindle of ABS to print some parts that I desired to be stronger and more resistant to use and tear. I ‘d open the window and leave the space to handle the fumes and be great, I figured.
I attempted printing the Z-Axis Stiffener supports for the A1 in ABS, however they went wonky. Lower bed temperature level and (particularly) ambient temperature level tends to make ABS warp and curl up, and extrusion-based printers count on accuracy to do their thing. When a layer– any layer!– gets messed up throughout a print, that will resound throughout the whole remainder of the item. Which is why my very first effort at assistances wound up being completely unusable.
Big ABS plastic prints are difficult to do on an open-bed printer. You can see here how that lower-left corner peeled up a little from the print bed, and any disproportion in the structure of your print is going to resound in the layers that are greater up.
Credit: Andrew Cunningham
I then attempted printing another set of assistances with PLA plastic, ones that declared to preserve their strength while utilizing less infill (that is, just how much plastic is really utilized inside the print to provide it rigidness– around 15 percent is normally an excellent balance in between rigidness and squandering plastic that you’ll never ever see, though there might be times when you desire basically). I’m still unsure what I did, however the prints I got were squishy and crispy to the touch, a clear indication that the quantity and/or kind of infill wasn’t enough. It wasn’t till my 3rd shot– the initial Bambu-made supports, in PLA rather of ABS– that I made assistances I might in fact utilize.
An effort at printing the exact same part with PLA, however with inadequate infill plastic that left my surface areas rough and the interiors vulnerable and crispy. I canceled this one about midway through when it ended up being clear that something wasn’t.
Credit: Andrew Cunningham
After much reading and research study, I found out that for a lot of things, PETG plastic is what you utilize if you wish to make stronger (and outdoor-friendly) prints on an open bed. Terrific! I chose I ‘d print the majority of the A1 ABS enclosure with clear PETG filament to make something resilient that I might likewise translucent when I wished to see just how much filament was left on a provided spindle.
This wound up being a challenging very first explore PETG plastic for 3 various factors. For one, printing “clear” PETG that really looks clear is finest made with a bigger nozzle (Bambu uses 0.2 mm, 0.6 mm, and 0.8 mm nozzles for the A1, in addition to the default 0.4 mm) due to the fact that you can get the exact same work carried out in less layers, and the more layers you have, the less “clear” that clear plastic. will be. Great!
The Inland-brand clear PETG+ I purchased from our regional Micro Center likewise didn’t enjoy the default temperature level settings for generic PETG that the A1 utilizes, both for the heatbed and the filament itself; plastic streamed unevenly from the nozzle and was vulnerable to coming separated from the bed. If this is taking place to you (or if you wish to try outreducing your temperature levels to conserve a little energy), entering into Bambu Studio, pushing temperature levels by 5 degrees in either instructions, and attempting a fast test print (I like this one) assisted me call in my settings when utilizing unknown filament.
This homebrewed enclosure for the AMS Lite multi-color filament switcher(and the leading install that sticks it on the top of the printer)has actually been my most significant and most intricate print to date. An 0.8 mm nozzle and some settings modifications are advised to optimize the openness of transparent PETG filament.
Credit: Andrew Cunningham
PETG is specifically vulnerable to soaking up ambient wetness. When that wetness strikes a 260 ° nozzle, it rapidly vaporizes, which can hinder the consistency of the circulation rate and the tidiness of your print (this generally manifests as “stringing,” fine, nearly cotton-y hairs that hang off your completed prints).
You can purchase devoted filament drying boxes or stick spindles in an oven at a low temperature level for a couple of hours if this truly troubles you or if it’s substantial enough to impact the quality of your prints. Among the factors to have an enclosure is to develop a humidity-controlled environment to keep your spindles from soaking up excessive wetness in the very first location.
The temperature level and nozzle-size changes made me pleased adequate with my PETG prints that I was great to choose off the little fuzzy stringers that were on my prints later, however your mileage might differ.
These are simply a couple of examples of the examples you find out if you leap in with both feet and explore various prints and plastics in quick succession. Ideally, this guidance assists you prevent my particular errors. The primary takeaway is that experience is the finest instructor.
The broad world of plastics
I utilized filament to print a modular filament rack for my filaments.
Credit: Andrew Cunningham
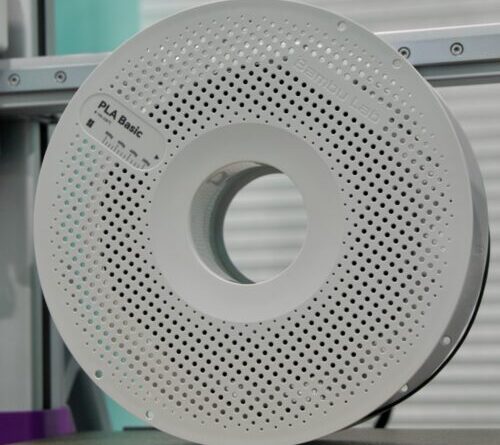
My partner had actually gotten me 2 spindles of filament, a white and a black spindle of Bambu’s own PLA Basic. What does all of that mean?
No matter what you’re purchasing, it’s most frequently offered in 1 kg spindles( the weight of the plastic, not the plastic and the spool together ). Everything you print will offer you a quote of just how much filament, in grams, you’ll require to print it.
There are numerous various kinds of plastics out there, on Bambu’s website and in other shops. Here are the huge ones I discovered out about nearly right away:
Polylactic acid, or PLA
Without a doubt the most frequently utilized plastic, PLA is affordable, offered in a big rainbow of colors and textures, and has a fairly low melting point, making it a simple product for many 3D printers to deal with. It’s made from sustainable product instead of petroleum, that makes it partially more eco-friendly than some other sort of plastic. And it’s simple to “finish” PLA-printed parts if you’re attempting to make props, toys, or other things that you do not wish to have that 3D printed appearance about them, whether you’re sanding those parts or utilizing a chemical to smooth the surface.
The disadvantage is that it’s not especially resistant– being in a hot vehicle or in direct sunshine for long suffices to melt or warp it, that makes it a bad option for anything that requires to endure outdoors or anything load-bearing. Its ecological authentic are likewise a bit oversold– itis naturally degradable, however it does not do so rapidly beyond specialized composting centers. If you toss it in the garbage and it goes to a land fill, it will still take its time going back to nature.
You’ll discover a lots of various type of PLA out there. Some have ingredients that provide a matte or smooth texture. Some have little particles of wood or metal or perhaps coffee or invested beer grains embedded in them, indicated to enhance 3D printed items with the appearance, feel, or odor of those products.
Some PLA simply has … some other type of undefined additive in it. You’ll see “PLA+” all over the location, however as far as I can inform, there is no industry-wide agreed-upon requirement for what the plus is expected to indicate. Makers in some cases declare it’s more powerful than routine PLA; other terms like “PLA Pro” and “PLA Max” are likewise non-standardized and unclear.
Polyethylene terephthalate glycol, or PETG
Family pet is a typical home plastic, and you’ll discover it in whatever from clothes fibers to soda bottles. PETG is the very same product, with ethylene glycol (the “G”contributed to decrease the melting point and make it less susceptible to taking shape and deforming. It likewise makes it more transparent, though attempting to print anything really “transparent” with an extrusion printer is challenging.
PETG has a greater melting point than PLA, however it’s still lower than other type of plastics. This makes PETG a great happy medium for some kinds of printing. It’s much better than PLA for practical load-bearing parts and outside usage due to the fact that it’s more powerful and able to flex a bit without warping, however it’s still flexible sufficient to print well on all sort of home 3D printers.
PETG can still be fussier to deal with than PLA. I more regularly had problems with the edges of my PETG prints coming unstuck from the bed of the printer before the print was done.
PETG filament is likewise specifically prone to soaking up wetness from the air, which can make extrusion messier. My PETG prints have actually generally had great deals of little wispy strings of plastic hanging off them by the end– insufficient to impact the strength or energy of the important things I’ve printed however enough that I required to pull the strings off to tidy up the print once it was done. Drying the filament effectively might aid with that if I ever require the prints to be cleaner in the very first location.
It’s likewise worth keeping in mind that PETG is the greatest type of filament that an open-bed printer like the A1 can manage dependably. You can be successful with other plastics, however Reddit anecdotes, my own individual experience, and Bambu’s filament guide all indicate a greater level of problem.
Acrylonitrile butadiene styrene, or ABS
“Going to look at the filament wall at Micro Center” is a legitimate father-son activity at this moment.
Credit: Andrew Cunningham
You most likely have a great deal of ABS plastic in your life. Video game consoles and controllers, the plastic secrets on a lot of keyboards, Lego bricks, home appliances, plastic parlor game pieces– it’s mainly ABS.
Thin layers of ABS stuck aren’t as strong or long lasting as commercially made injection-molded ABS, however it’s still more heat-resistant and long lasting than 3D-printed PLA or PETG.
There are 2 huge problems particular to ABS, which are likewise detailed in Bambu’s FAQ for the A1. The very first is that it does not print well on an open-bed printer, specifically for bigger prints. The corners are more vulnerable to bring up off the print bed, and just like a home, any issues in your structure will resound throughout the rest of your print.
The 2nd is fumes. All 3D-printed plastics produce fumes when they’ve been melted, and a great guideline is to a minimum of print things in a space where you can open the window (and not in a space where anybody or anything sleeps). ABS and ASA plastics in specific can discharge fumes that cause eye and breathing inflammation, headaches, and queasiness if you’re printing them inside your home with inadequate ventilation.
When it comes to what amount of printing counts as “dangerous,” there’s no genuine agreement, and the research studies that have actually been done primarily land in undetermined “further study is needed” area. At a bare minimum, it’s thought about a finest practice to a minimum of have the ability to open a window if you’re printing with ABS or to utilize a closed-bed printer in a vacant part of your home, like a garage, shed, or workshop area (if you have one).
Acrylonitrile styrene acrylate, or ASA
Explained to me by Ars coworker Lee Hutchinson as “ABS but with more UV resistance,” this product is even much better fit for outside applications than the other plastics on this list.
Likewise like ABS, you’ll have a tough time getting excellent outcomes with an open-bed printer, and the fumes are more damaging to breathe in. You’ll desire a closed-bed printer and good ventilation for excellent outcomes.
Thermoplastic polyurethane, or TPU
TPU is best understood for its versatility relative to the other type of plastics on this list. It does not get as breakable when it’s cold and has more impact-resistance, and it can print fairly well on an open-bed printer.
One drawback of TPU is that you require to print gradually to get dependably excellent outcomes– a discomfort, when even fairly easy fidget toys can take an hour or 2 to print at complete speed utilizing PLA. Longer prints indicate more power usage and more chances for your print to remove the print bed. A roll of TPU filament will likewise typically run you a couple of dollars more than a roll of PLA, PETG, or ABS.
– or third-party filament?
The first-party Bambu spindles have actually RFID chips in them that Bambu printers can scan to immediately reveal the type and color of filament that it is and to track just how much filament you have staying. Bambu likewise has temperature level and speed presets for all of its first-party filaments developed into the printer and the Bambu Studio software application. There are presets for a couple of other filament brand names in the printer, however I typically wound up utilizing the “generic” presets, which might require some tuning to guarantee the very best possible adhesion to the print bed and extrusion from the nozzle.
I primarily wound up utilizing Inland-branded filament I got from my regional Micro Center– both due to the fact that it’s less expensive than Bambu’s first-party things and due to the fact that it’s faster and much easier for me to get to. If you do not have a brick-and-mortar pastime shop with filaments in stock, the A1 and other printers often include some sample filament examples so you can see the texture and color of the things you’re purchasing online.
What’s next?
Part of the enjoyable of 3D printing is that it can be utilized for a broad selection of jobs– arranging your desk or your kitchen area, printing out bit fidget-toy favors for your kid’s birthday celebration, printing out replacement parts for little plastic bits and bobs that have actually broken, or simply printing out designs and other things you’ll take pleasure in taking a look at.
When you’re equipped with all of the fundamental info in this guide, the next action is truly approximately you. What would you discover enjoyable or beneficial? What do you require? How can 3D printing assistance you with other family jobs or pastimes that you might be attempting to get into? For the tail end of this series, the Ars staffers with 3D printers in your home will share a few of their preferred prints– hearing individuals discuss what they ‘d done themselves actually opened my eyes to the possibilities and the energy of these gadgets, and more individual reviews might assist those of you who are on the fence to climb up down off of it.
Andrew is a Senior Technology Reporter at Ars Technica, with a concentrate on customer tech consisting of hardware and thorough evaluations of running systems like Windows and macOS. Andrew resides in Philadelphia and co-hosts a weekly book podcast called Overdue.
121 Comments

Learn more
As an Amazon Associate I earn from qualifying purchases.