

As an Amazon Associate I earn from qualifying purchases.

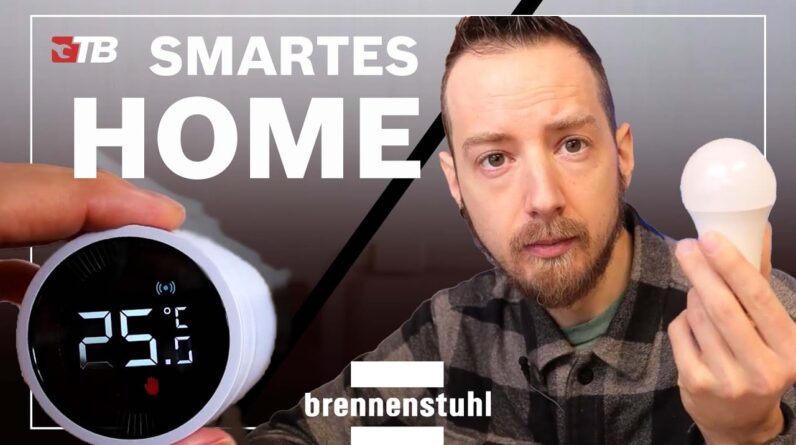
Hello everyone and welcome to
the TOOLBROTHERS! My name is Alex, you may know me from my own
channel Alexander Metzger, it's also a lot about smart things and today it's going to
be smart again. You may have already seen it in the last videos, where I introduced you to the
LED worklight or the LED headlight with motion detector and now
we'll delve a little further into the whole matter. I brought you something for this and
today we want to make the radiator smart and thus save energy costs, make the socket
smart and maybe even make one or the other lamp smart.
I'll tell you how it works and you may have already seen it on the packaging, some are
orange at the top, this one is red at the top and then I also have this one here: ZIGBEE topic.
Yes, but who is
this ZigBee and what does it have to do with my WLAN ? That's what I'm coming to now, because this is
fundamentally a very exciting and important topic. A lot of smart devices work
with ZIGBEE and yes, that's different from WiFi and it can't be combined directly out-of-the-box
, so I always need a bridge and a bridge connects my router
with the devices that don't speak WLAN, they only speak ZIGBEE. That sounds
a bit more complex and stupid at first, but there wouldn't be ZIGBEE if it didn't also have
a few advantages. WLAN was created to provide a network over-the-air, i.e.
to connect computers with each other, so the focus with WLAN has always been on achieving the highest possible
data rate, and things like power consumption are of
course a bit secondary . Of course, it also plays a role with mobile phones and laptops
, but you basically have a very large battery available for it and
a very large battery and the higher priority is of course always the data throughput.
With
Zigbee it looks a bit different. Zigbee comes from the IoT world, i.e. where
smart home devices are to be networked with each other . The data throughput plays a totally
subordinate role here, because if I somehow want to transmit "Turn my light on
or off" – this is not a 4K video that I'm streaming.
That's just a mini, mini, minimally
small amount of data that I have to transfer or with a radiator thermostat like that, where I
move any temperatures back and forth. I don't need any amount of data. That is why
ZIGBEE devices can work much more economically and another very, very big advantage
of ZIGBEE is that the devices communicate with each other. So I don't have to get from my
bridge to every single ZIGBEE device, but each works as
its own small hub, which can then be further networked and so I can relatively
easily achieve much better coverage than via WLAN. Because with WLAN I have a
node and from there I have to reach every device, with ZIGBEE I have my gateway, it
has to get to this one and if I now have another one somewhere, then that's enough for it
to get there and then I don't necessarily have to go from my gateway to the very last
consumer or actuator.
And that's a mega advantage, because everyone knows that WiFi, the general
rule of thumb is that at 2.4 gigahertz it's over after three walls and at
5 GHz, which is the faster standard, it's over after two walls. Yes, and if I then
want to make such a house smart, then two walls are just not that much, or three
walls. By the way, both WiFi and ZIGBEE transmit in 2.4 Ghz. So the band is completely the same.
There's always this approach: "Yes, I want as little radiation as possible here in my
home" That's totally understandable, I also want as little radiation as possible
in my home, but since they're both in the same frequency range,
I'm only getting a little bit more now. But, if my wish is to have a smart
home, then unfortunately I have to accept that something is going around and how
the whole thing works, let's take a look at it directly. At BRENNENSTUHL, it's actually
really exciting that I can mix the devices.
So I can manage WLAN devices with ZIGBEE devices in
one app, in order to be able to network the ZIGBEE devices now, I need this
bridge here. It's actually a very small part. It comes with a small micro USB charging cable
or a power supply cable and a small 230 watt power supply and I just have to attach it
somewhere, preferably somewhere relatively central. Where it can achieve relatively good coverage
and where it still has good reception to my WiFi router. Because that opens
the door to the ZIGBEE world. I'll put that in my pocket now . If you then press the on switch at the top
, two LEDs light up, one blue and one red. Now all you have to do is
download the BRENNESTUHL Connect app and then open it on your smartphone. If you then
click on + at the top, you have a whole list of devices here and you can see here immediately the orange
ones are the WLAN devices and the red ones are our ZIGBEE devices just mentioned. Down
here I have the gateway, I click on it, then my WLAN is suggested to me down here
, with which I will now equip the gateway right here.
Then I move on next
and that he says here plug in the device and confirm the red led is blinking fast.
It flashes quickly, confirm. Now he's looking for his colleague and that's it, completion
and we have our ZigBee gateway here, of course no devices have been
added yet, we'll do that later. I'll pack the socket here right now
. The scope of delivery includes a socket and this beautiful socket
has a cover and with IP 44 is also suitable for outdoor use, since the second number – the
four – means that it is protected against splashing water from all sides . So you could,
for example, plug it into an outside socket and then, for example, plug in the Christmas tree lights
from outside and then switch on smart.
I plug it into the socket
and then we add it too. Simply click on the plus again at the top and then you can
already see "socket with IP44" at the top, that's the right one and to start the learn mode, I have to
plug and unplug it three times now. I've already done that, the LED flashes blue and quickly
in succession and I click add.
We already know that, I'll skip it.
Now I can easily switch my socket on and off with the app, you may hear it
. I have a timer here, so I can say for example here: "I want to turn on every morning at
6:23 every Monday and turn off at 9:33 ". And so I can now
store a program that, for example, switches my Christmas tree lights on
and off in a smart time-controlled manner. Or a fountain or something. With countdown, I could
just say switch it off, but in an hour or I just switch it off directly and you
see, I still have all my smart
stuff relatively clearly arranged in one app. That's why it always makes sense, if you don't have a home assistant or IO broker
, these are sort of control centers, to control smart devices
across manufacturers, then it often makes sense to just stay with one manufacturer so that I have everything
in one app . Now I can also add a lamp in the same way, for example
, and I wouldn't need any electrical knowledge at all for such a lamp to make this
smart, because I simply unscrew the lamp from my socket and
then unscrew it BRENNENSTUHL lamp in.
Now I can turn it on and off just like it was before
, but it's a smart light so I can add that too. Here
, the 5 GHz network is still recommended. turn off and turn on the device. You can
see that the disco is already going on back there, because it often flashes now. You just have to
turn it on and off three times. Yes, the device flashes quickly, then add it again.
We already know that now, I'll skip again.

The one on the back has now
stopped flashing, meaning we've now integrated it into the part of our smart home.
Completion. So and now I can change the color temperature here, that is. already really
cool. I can also adjust the brightness, from very dark to very bright. I have
a timer again, similar to the one just now, and I could even say here, in addition to
a simple color temperature, that I now want the lamp in blue. You
can't see it that well in the video.
Green, well , I can put together all the colors here
and I could also store some scenes here. With
colorful, the color now changes a bit. Or I go to colored here,
then it changes a little faster. In a reading scene, it's very neutral,
bright light. And so I have a lot of opportunities to do all sorts of things with the lamp
. So, ZIGBEE gateway is inside, lamp is inside, socket is inside
and now we come to the most exciting part, we make the heating smart! The first
question you always have to ask yourself: Will this thermostat fit my radiator?
In order to create the greatest possible compatibility with as many radiator thermostatic valves as
possible, BRENNENSTUHL has come up with something here , they have simply added all
sorts of adapters to the scope of delivery.
That I can screw it directly to HEIMEIER, to DANFOSS,
to all common thermostatic valves . There are a lot of
different systems out there. DANFOSS, for example, often has a snap lock, but there are
systems from other manufacturers that have a thread. You can activate the batteries with this yellow ripcord here
. I'll just show you those too . Actually, you only
have to turn the housing here and then you can pull this out and then you can see that there are simply a
standard AA battery inside. I think that's a great thing, because if there are any
special batteries inside, like the ones you sometimes see in
photos, you can't get them everywhere , nobody has them at home.
That's just annoying
, even if there are perfectly normal AA batteries inside. Everyone usually has them at home.
Simply replace, done. To assemble the whole thing, we actually only need a
Phillips screwdriver. Yes, then assemble it. This is now a thermostatic valve
from DANFOSS. One of the common ones and back here is a snap closure and you don't have to be
afraid if you take that off then no water will come in – no water will come out! Simply
turn the snap fastener here at the back and then you can pull it off and now you can
usually hear the heating water now flowing into the radiator. No fear! This is completely
normal, because the valve actuation is here and when the thermostatic head is down, then it is
all the way out here, i.e. the valve is fully open, and now there is also the right adapter for it here
.
I just have to place it on it, now I just have to make sure
that the screw can be tightened, then I tighten the screw and always
align it so that BRENNENSTUHL is up here. So, let's pull the yellow ripcord and
I'll go back to my app here. And the same game from the beginning, I go back to
add, now select the thermostat here, select my gateway and now triple press
the display. 1, 2, 3! If a display flashes green up here, think this will now be the
teach-in mode and the ring here will also flash. Oh, that was really, really fast.
Now it's added. I can now just say radiator thermostat, so you are
in the kitchen now, for example. Complete. According to the instructions , the inflation mode must be activated beforehand
by pressing here for 3 seconds. I saved that because it does that automatically.
And now it's actually ready for use.
I can now
sort of switch through the individual modes here. You can now also see down here, manual operation is now
activated. I can change the temperature when I'm shooting here now. You hear that too.
That's relatively loud. Now the servomotor moves up and down inside and sets the
temperature. Or if I leave now, I press it and then we have the
setback mode to 15 degrees. This would be the time program. Then it just runs the set
time program. Or I go on it again, then we are in manual mode as usual and
I can set the desired temperature.
So, in the app we now have
the option to control the time program. Now I can walk on here. Now the thermostat is
in the time program, if I go on it again , I can save times.
For example, from 10 a.m. to 11 a.m. it is 20 degrees and from 11 a.m. 23 degrees and so you can
set, for example, when I am at work, that the temperature is then lowered. 16
degrees is a good value here, because the building doesn't cool down too much and when I come home
an hour before, everything heats up again. If I go to work here, then I'm
in manual mode quite normally and can then set my desired temperature here
and the thermostat will then do it automatically and then automatically maintain the temperature.
Incidentally, I can see the measured temperature below and here on the right, that would be the
frost protection mode, it simply makes sure that nothing freezes, for example when I'm on
vacation longer. Down here we also have automatic valve adjustment and automatic
window detection, so if the window opens, the temperature drops quickly, then it
closes briefly until the window closes again, so as not to waste energy unnecessarily.
You can also see that as soon as I change something, the thermostatic head starts immediately and changes the
temperature too, and I can also set the temperature here manually at any time and
you can hear it too, then the valve adjusts itself .
It's not very quiet, but it's
not annoyingly loud either. My conclusion about the smart BRENNENSTUHL products is that it really is a
great product range, with more to come. Above all, more ZIGBEE devices
and I used to resist ZIGBEE a bit because I didn't want to have
another radio standard in my home, but when you see how well ZIGBEE works,
it really makes sense. Especially when you consider the energy consumption. If
I only have WiFi devices, then of course they need a bit more power
just to make their functionality available. That's one of the advantages of ZIGBEE and
also that it's a lot easier to network such a complete building with
only ZigBee devices, because everyone knows WiFi, you're somewhere in the basement and then
you'll have problems , since you can also add WiFi and that works
really well with ZIGBEE and because it can be mixed so easily in the app,
the ZIBGEE devices with the WiFi devices also give you the advantages of both worlds.
You can make your home smart very, very quickly .
You have sockets, you
have headlights, simple lamps and you can make your home smart in no time.
Personally, I like the thermostat head best, because you can of course really
save energy here, and that's of course also a great thing, for example when you're on
vacation and can then start at home to bring the house up to temperature again or
just turn it down during the day, when you're at home in the evening , then just heat it up. I hope
you enjoyed the video on the subject of BRENNENSTUHL smarter homes and you'll check
back next time, until then! Bye!.
As an Amazon Associate I earn from qualifying purchases.


