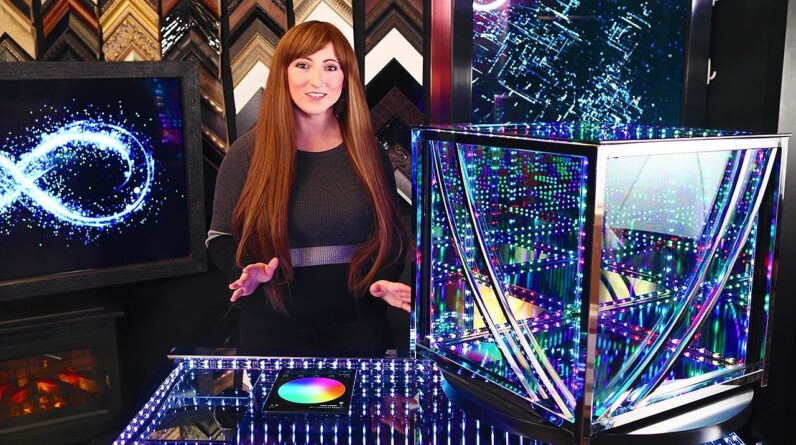
KRISTA: In this video,
I'm going to take you step by step through
my HyperCube build, which will save you a
ton of time building your own infinity mirror cube. I'm going to outline the best
glass to use, how to frame it, and how to add LED chasing
lights, like these. I'll even show you
how the lighting effects can be controlled
from your phone, like this. [MUSIC PLAYING] Hi, guys. I'm Krista, mirror geek
for Twowaymirrors.com. A HyperCube works by combining
a semi transparent mirror and a first surface mirror
with LED strips in between. The transparent mirror
we use is a glass two-way mirror with a temporary top
piece to prevent shattering. To further enhance the
number of reflections, I used a first surface mirror
on the base of the cube.
A lot of people ask me,
what glass should I use? To make a true HyperCube, your
glass should be directional. This is critical to creating
that super deep infinity effect with very few
reflections coming off of it. This is a standard glass
two-way mirror sample. And this is what we recommend
for infinity cubes like this. When I show it this way,
this is the non-mirror side. So it looks dark. But when you flip it over, you
get to see the mirror side. If it's not directional,
it will look like this. This is an acrylic two-way
mirror sample that we have. It's a mirror on this side,
but when you flip it over, it's still a mirror. Ideally, use the real deal. If you're on a
budget, you can use a directional
two-way mirror film. The film appears more foggy,
so you get fewer reflections. For the bottom mirror, I used
an acrylic first surface mirror. I use this instead
of a standard mirror because the mirror coating
is actually on the top, making the HyperCube
virtually seamless. What type of LEDs should I use? For the LED light
strip, I recommend using a bright one,
at least 12 volts.

5-volt strips tend
to be way too dim. You'll want an LED strip
that supports individually addressable LEDs. This will allow you to truly
customize your cube, which is a lot of fun. You could make your own
kaleidoscope effects, or maybe a slow, meditative trance. Pick your favorite
colors and get creative. The controller works
hand-in-hand with the strip, so you'll need one that's
compatible and connects to your phone with
Wi-Fi or Bluetooth. Don't worry. I'll leave links to the parts
in the description below. Now let's talk about the frame. To save time and money,
I bought an end table with glass on Amazon
for less than $100. Then I added metal strips
from Home Depot, which were cut to size using a chop saw. The metal strips
support the LED tape, allowing light to be
channeled within the table. I chose this table because it's
an ultra thin and sleek design, so thick bars aren't
obstructing the view. Here's how it all fits together.
[MUSIC PLAYING] Hit that subscribe
button right now to stay tuned for
my next video, where I go into even more detail
on how to put this together. I'm super excited to use mine. Cameraman, where is my
infinity mirror dress? [MUSIC PLAYING] If you have any questions,
leave a comment below, or shoot me an email. Until next time, I'm Krista,
and I'm outtie 5,000. [MUSIC PLAYING].
As an Amazon Associate I earn from qualifying purchases.


